1. Introduction: Why Wall Lighting Makes the Difference
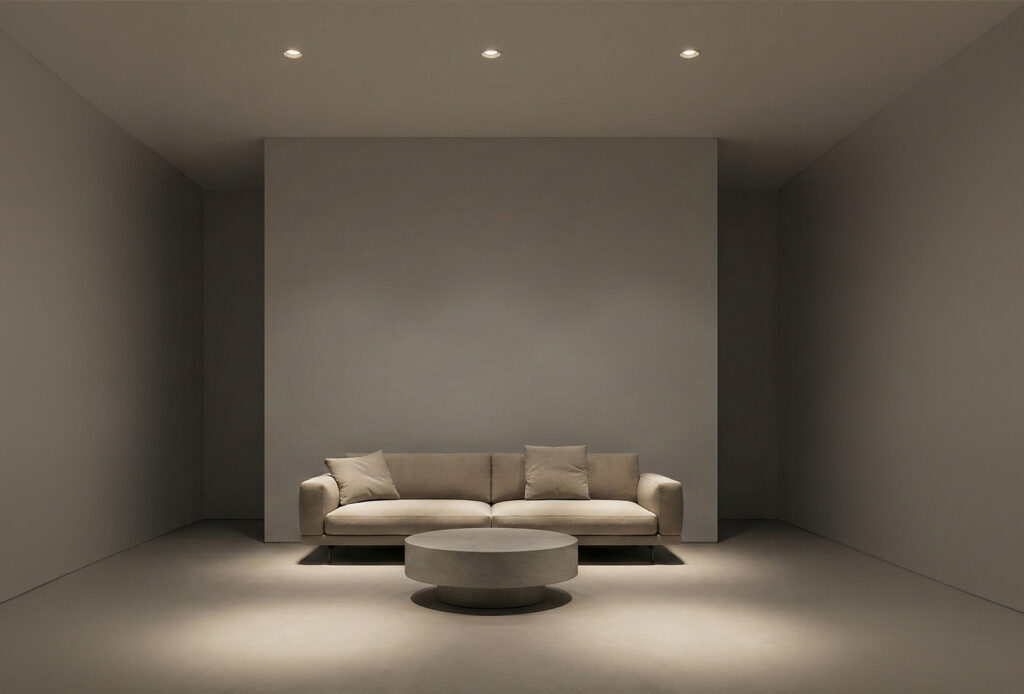
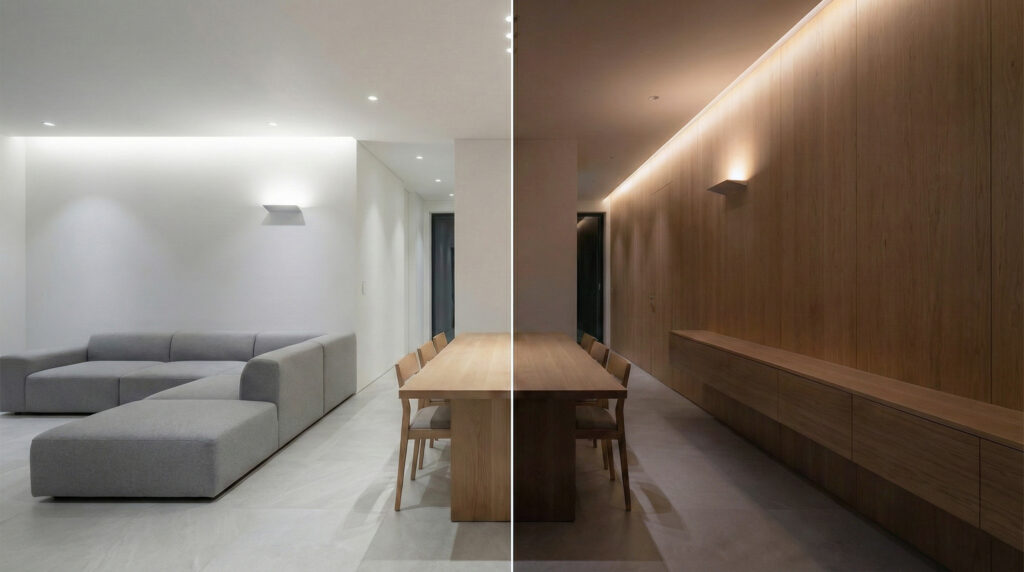
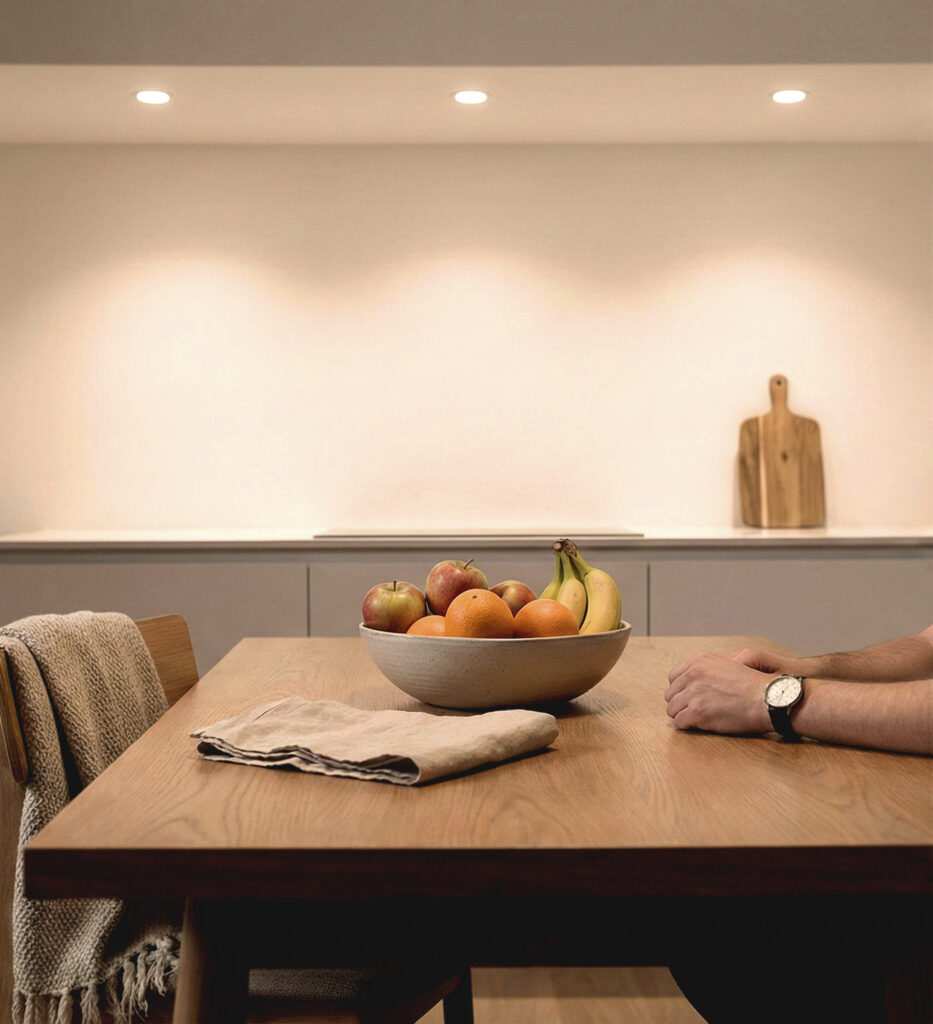
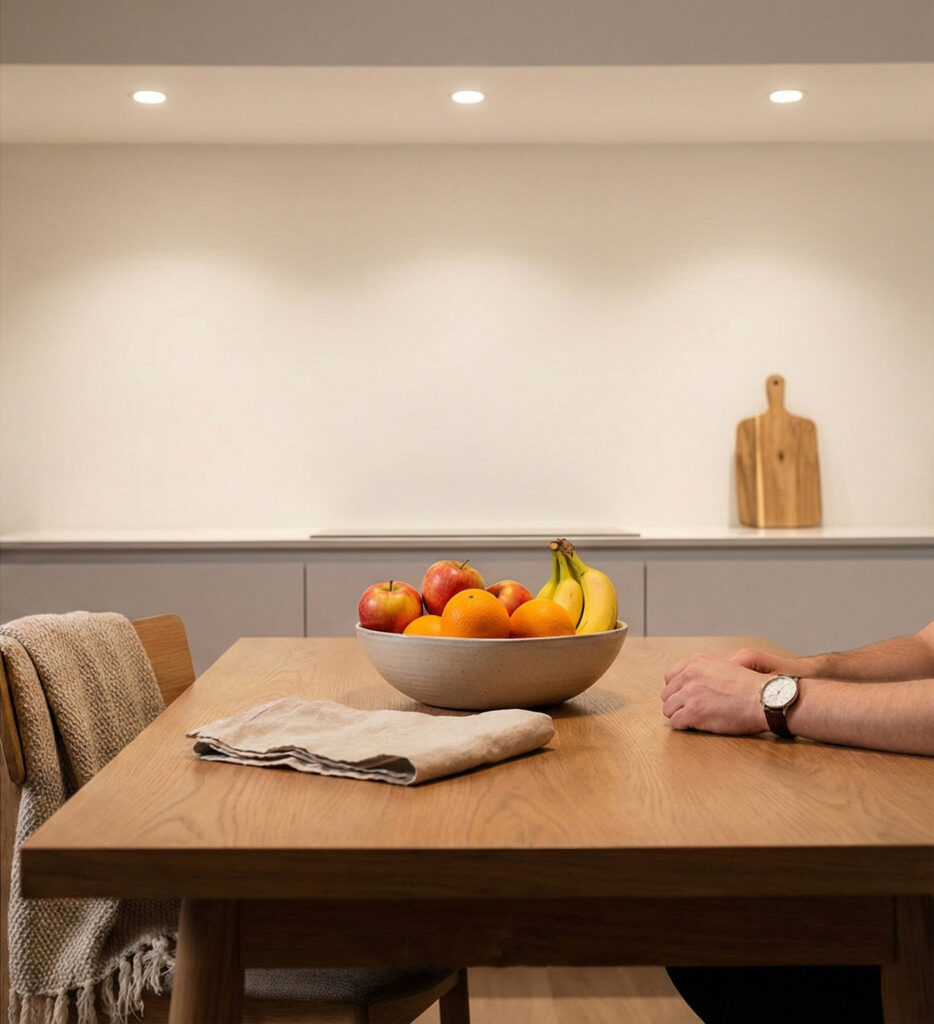
Wall lighting is not a decorative touch. It is a design tool that affects proportions, materials, safety, and the overall atmosphere of a space — interior or exterior.
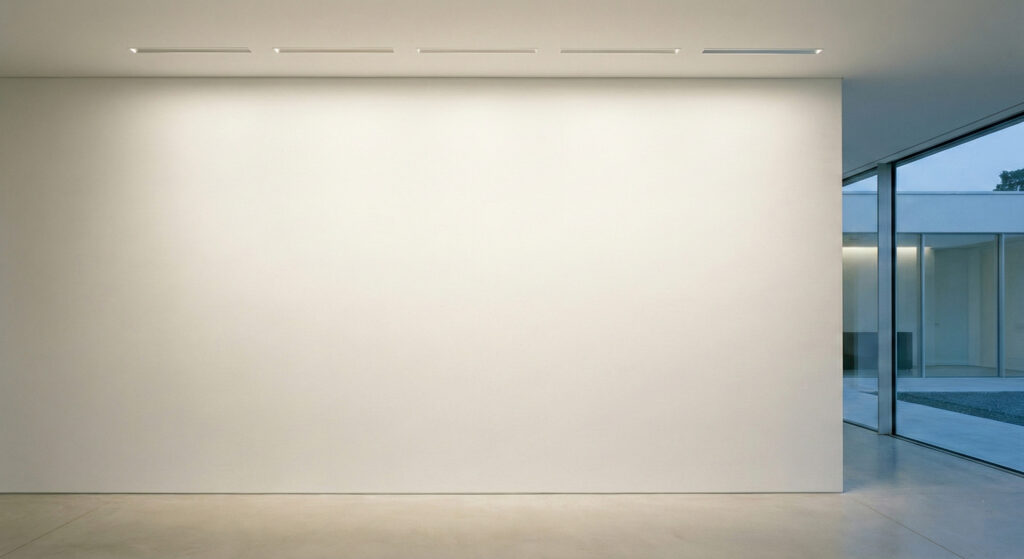
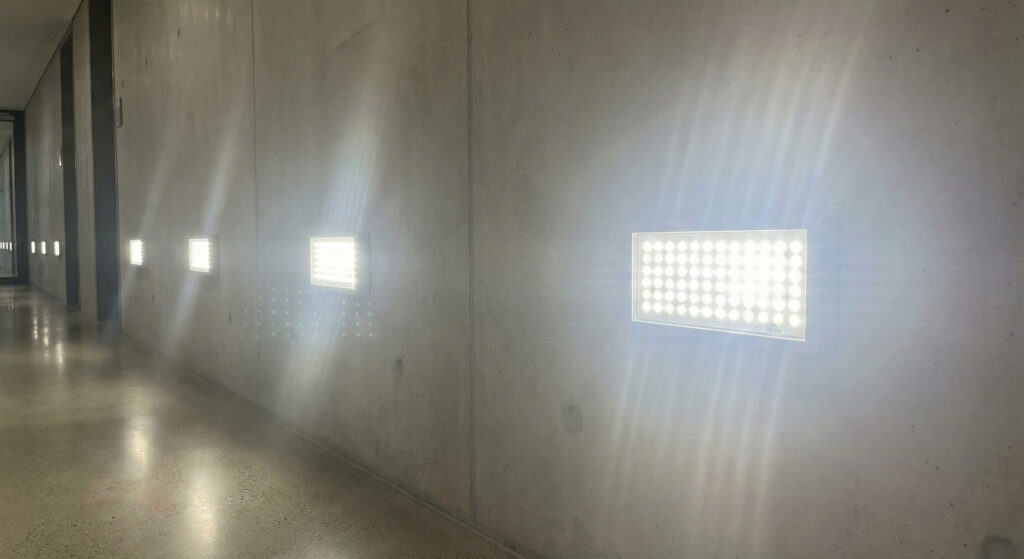
A properly lit wall makes a space appear larger, brighter, and safer. This principle — vertical illuminance — forms the basis of every proper lighting design. Our eyes perceive space primarily through vertical surfaces: we look at walls, faces, and objects 80% of the time — not floors or ceilings.
This guide is designed for three categories of readers:
- Property owners: Practical rules, mistake avoidance, proper communication with your electrician
- Contractors & electricians: Installation checklists, minimum IP/IK, technical comparisons, rules of thumb
- Architects & lighting designers: Design principles, layering, CCT/CRI, decision trees, photometric considerations
What makes wall lighting so important?
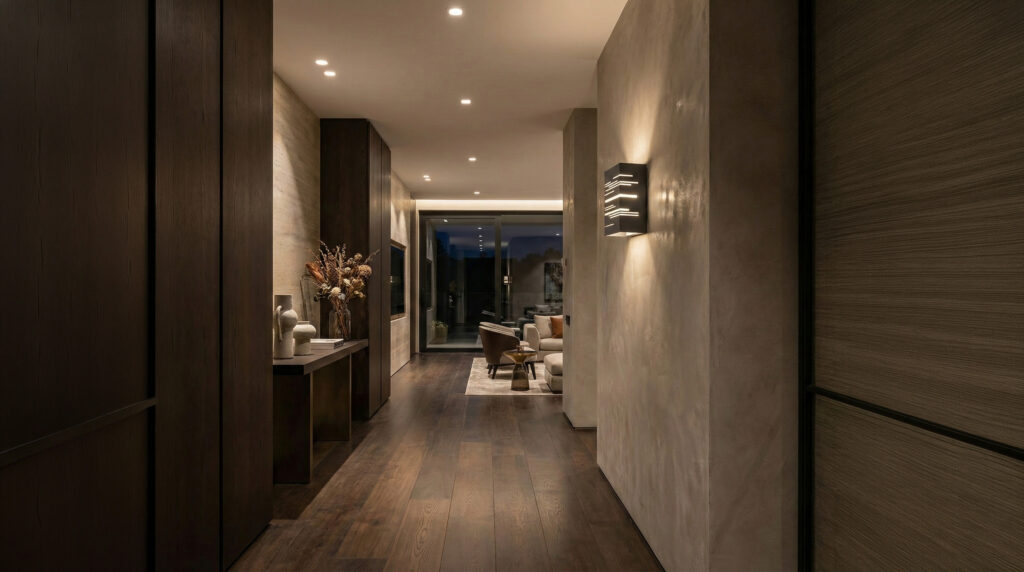
Unlike ceiling lighting that casts light downward, wall lighting creates vertical illuminance — it illuminates what we actually see. Studies show that vertical illuminance improves the perception of brightness by 30-50% compared to the same number of lux on the floor only. This means:
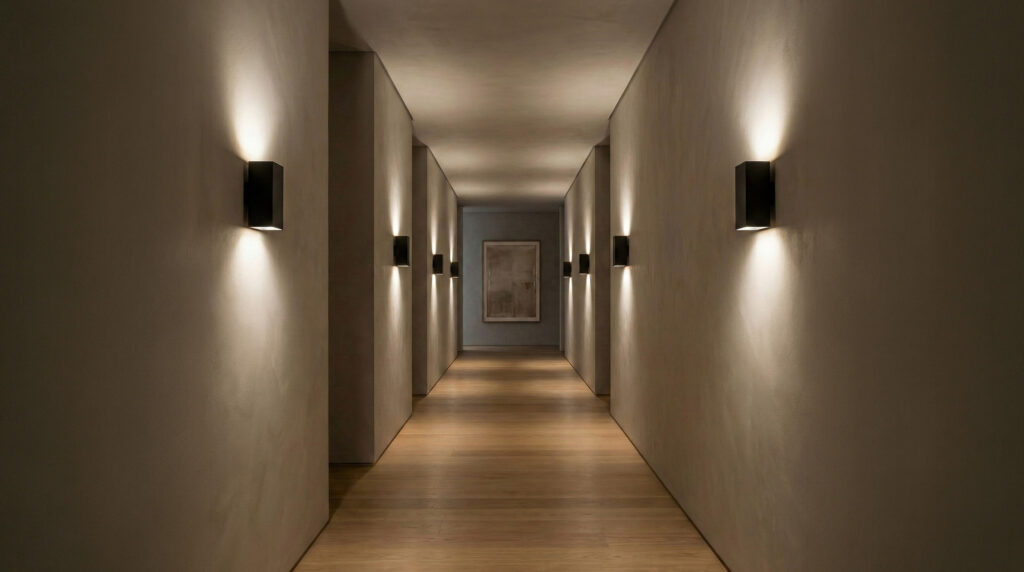
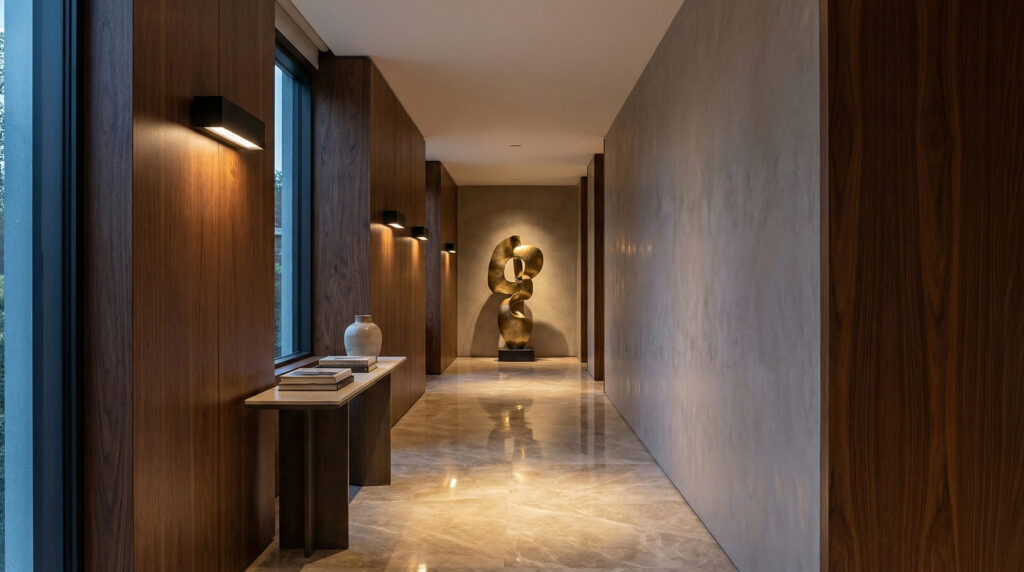
- Greater sense of space: Illuminated walls "open up" even narrow corridors
- Safety: Facial recognition, proper orientation, sense of movement
- Architectural enhancement: Textures, materials, colors — revealed at night
- Atmosphere: Warm, soft wall lighting vs cold, "clinical" ceiling light
2. Wall Lighting Design Principles
Before selecting a luminaire, you need to understand the 6 fundamental principles that govern every proper wall lighting design. Ignoring even one will lead to a disappointing result — regardless of the luminaire's quality.
2.1 Vertical Illuminance
Human vision perceives space primarily through vertical surfaces. An illuminated wall improves visual comfort, reduces fatigue, and enhances spatial perception. The basic principle is simple: we illuminate what we look at. We look at walls, faces, and objects 80% of the time — not floors or ceilings.
This is why a space with good wall lighting "appears" brighter even with fewer watts. The perception of brightness does not depend solely on lux at floor level — it depends primarily on the luminance perceived by the eye on the vertical axis.
2.2 Uniformity & Contrast
The uniformity-contrast relationship determines whether a space "reads" as calm or dramatic. High uniformity (wall washing) creates serenity, spaciousness, and order. High contrast (grazing, accent lighting) creates depth, mystery, and character. There is no "right" answer — the choice depends on the purpose of the space.

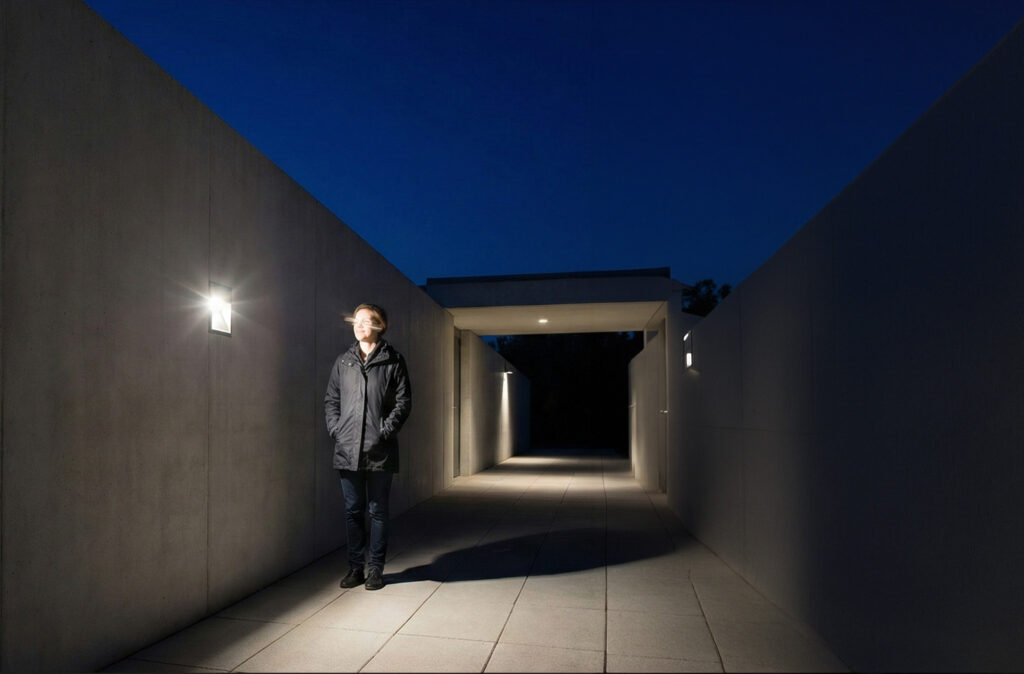
2.3 Glare Control
Glare is the most significant factor in poor lighting quality. Three simple rules eliminate 90% of the problems:
- The LED source must not be visible — deep recessed optics, frosted lens, or cut-off design
- The beam is directed at the wall — not toward the space or the eyes
- The eye line (~1.60 m) does not intersect the beam — the source is always placed above or below
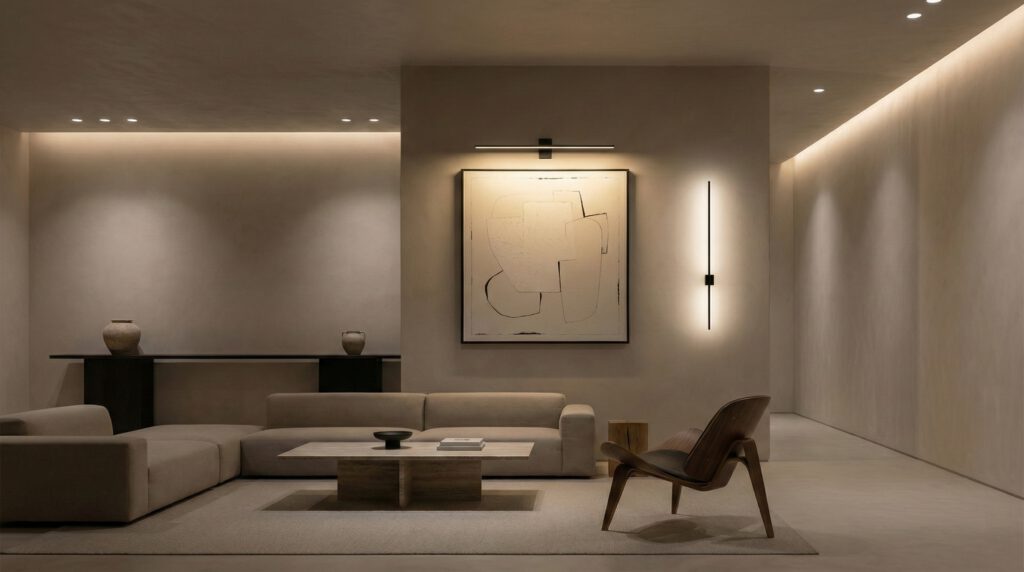
2.4 Lighting Layers
Wall lighting is part of a three-layer system. No layer works on its own — proper design combines them:
In practice, this means: do not install only downlights in the ceiling (ambient). Add wall lighting (wall layer) for a sense of space. If there are paintings, shelves, or objects, an accent layer highlights them. The combination of all three creates a professional result.
2.5 Beam Angle
The beam angle determines how wide the light spot is on the wall. There is no "right" angle — it depends on the application:
| Angle | Application | Advantage | Risk |
|---|---|---|---|
| 5°–15° | Tall facades, columns, trees | Long throw, dramatic | Spots if there is no target |
| 20°–36° | General use, Up/Down | Versatile, balanced | Somewhat "flat" at great heights |
| 40°–90° | Ambient, small spaces | Large coverage, fewer luminaires | Intensity is lost |
| Asymmetric | Wall washing, lobbies | Uniform wall coverage | Less flexibility |
2.6 Dimming & Lighting Scenes
Modern wall lighting never operates at 100%. Dimming is not a luxury — it is a fundamental design tool: energy savings, extended LED & driver life, scene creation, atmosphere.
| Protocol | Type | Ideal for | Advantages | Disadvantages |
|---|---|---|---|---|
| DALI / DALI-2 | Digital | Hotels, offices, >10 luminaires | Individual control, scenes, addressing | Cost, requires dedicated bus |
| 0-10V | Analog | Residences 4-8 luminaires | Simple, low cost | Group dimming, no scenes |
| Bluetooth / Casambi | Wireless | Renovations, small installations | No wiring, smartphone app | Range, network reliability |
| PWM | Analog | Strips, special applications | Precision, low cost | Poor implementation = flicker |
| Tunable White | Variable CCT | Hospitality, wellbeing | 2700K–6500K, circadian | Cost, complexity |
3. Wall Luminaire Types
Each type of wall luminaire creates a different visual effect. The selection is not aesthetic — it is a technical decision that depends on the wall material, the purpose of the lighting, and the geometry of the space.
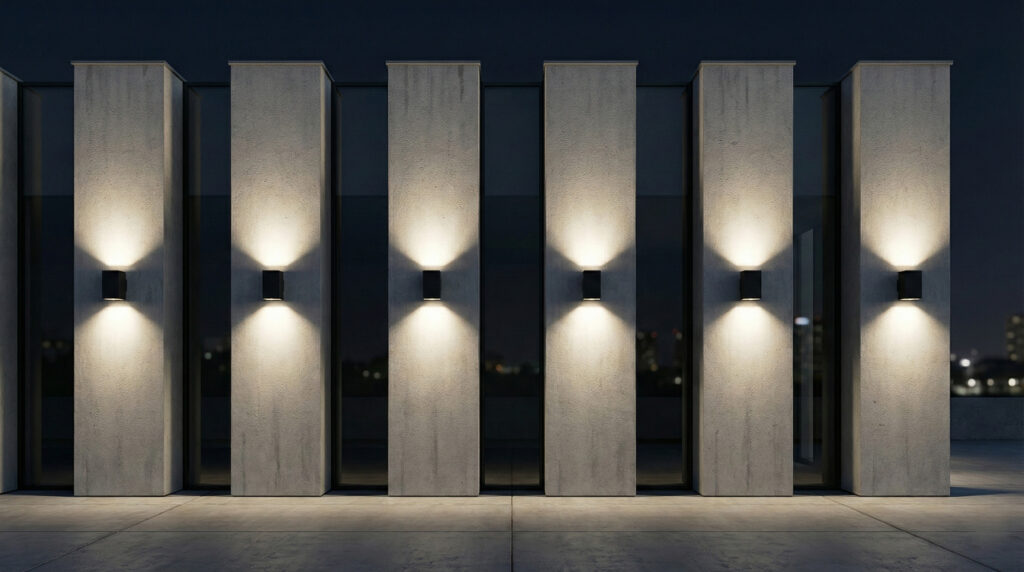
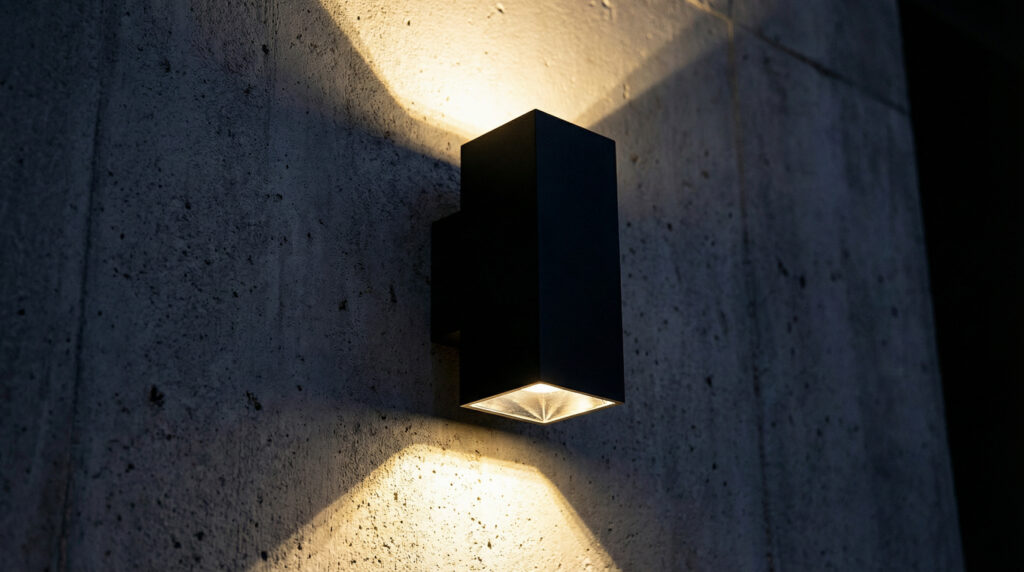
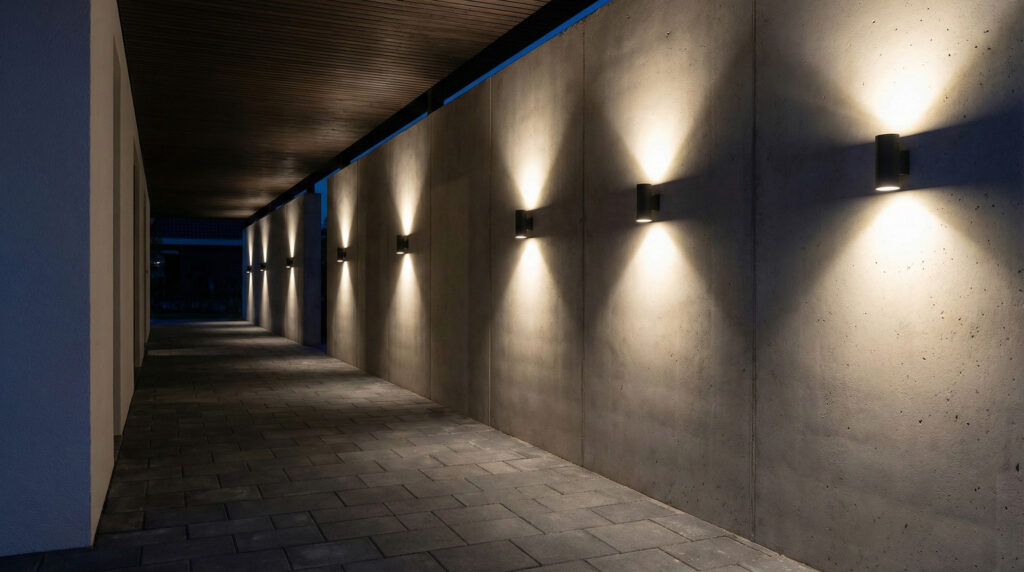
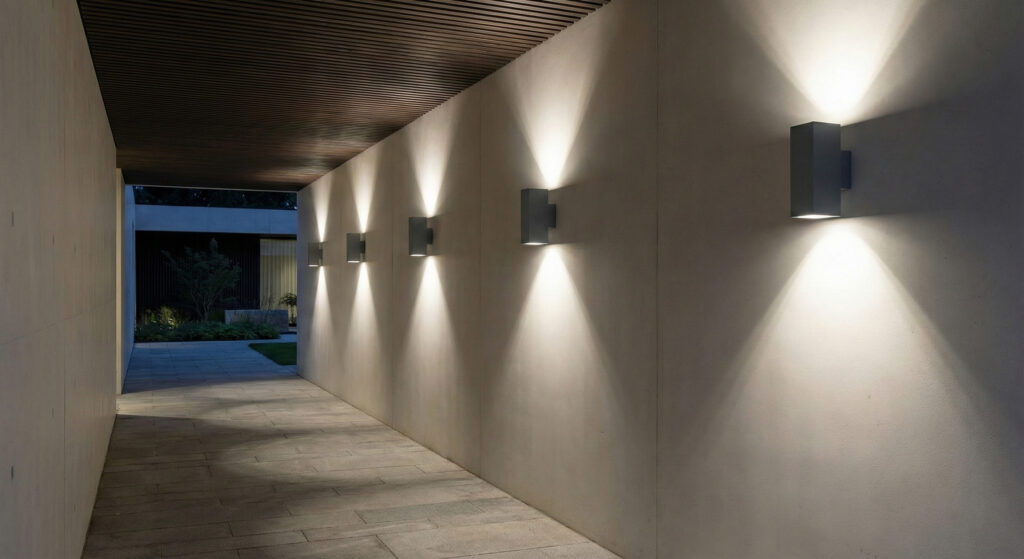
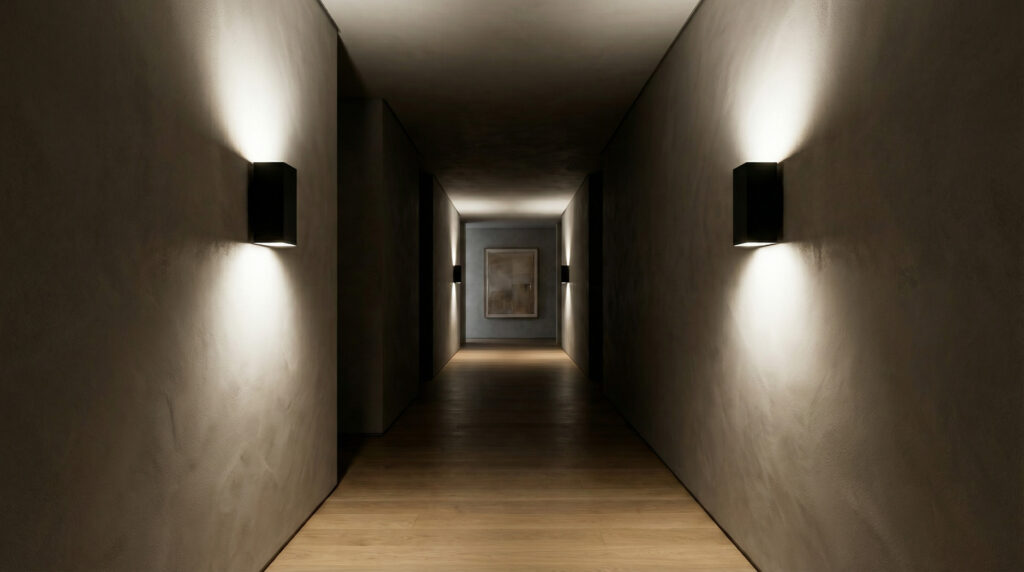
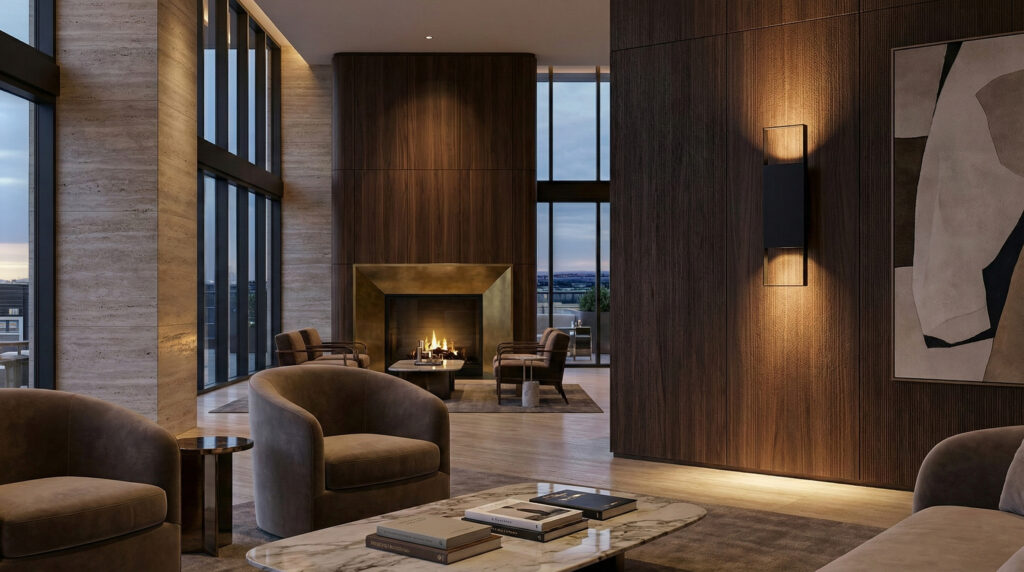
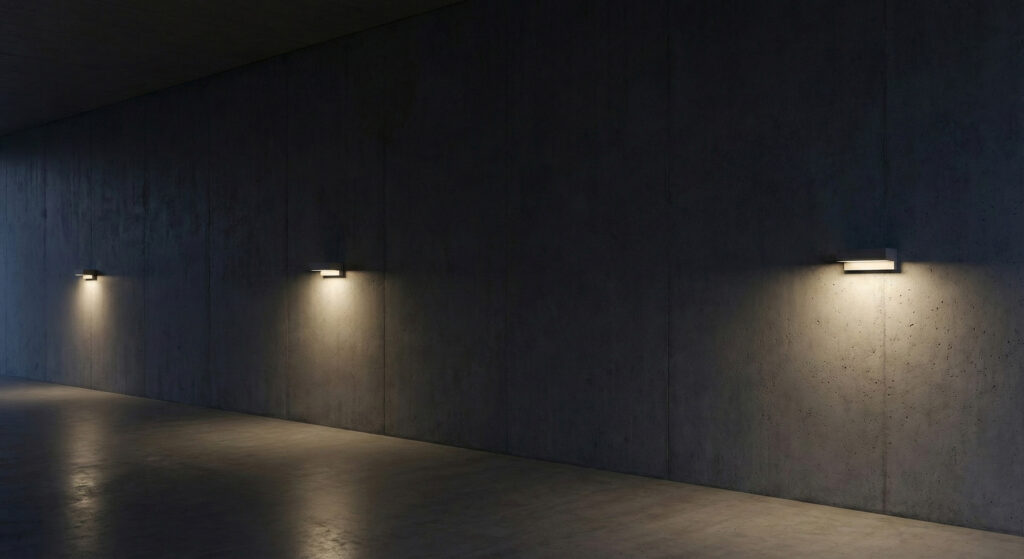
3.1 Up/Down
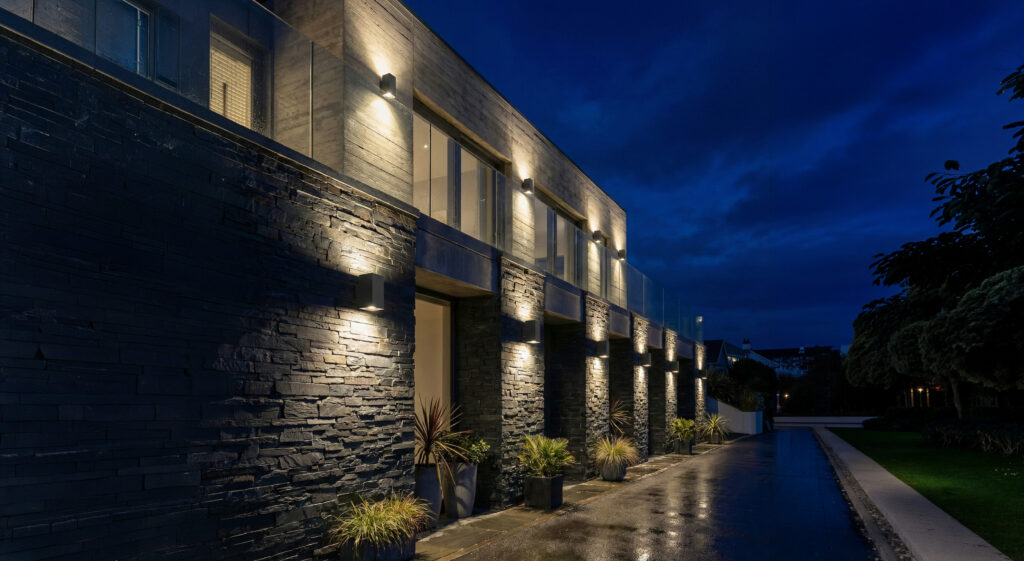
The most popular luminaire in architectural lighting. It emits light upward, downward, or in both directions. It creates rhythm on the facade, emphasizes height and geometry. It is mounted flush or very close to the wall (0-20 cm).
- Symmetric Up/Down: Equal light up-down — classic rhythm on facades
- Asymmetric Up/Down: E.g. 70% down / 30% up — less light pollution
- Down only (or Up only): Unidirectional — wayfinding, stairs, safety
- Adjustable: Adjustable beam angle — great flexibility in situ
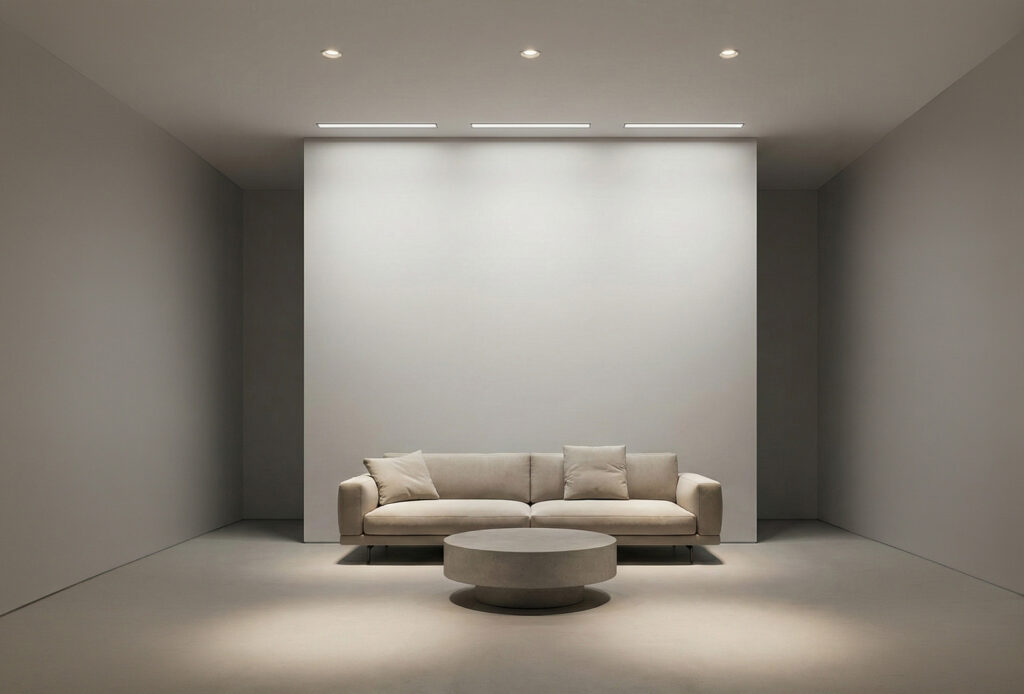
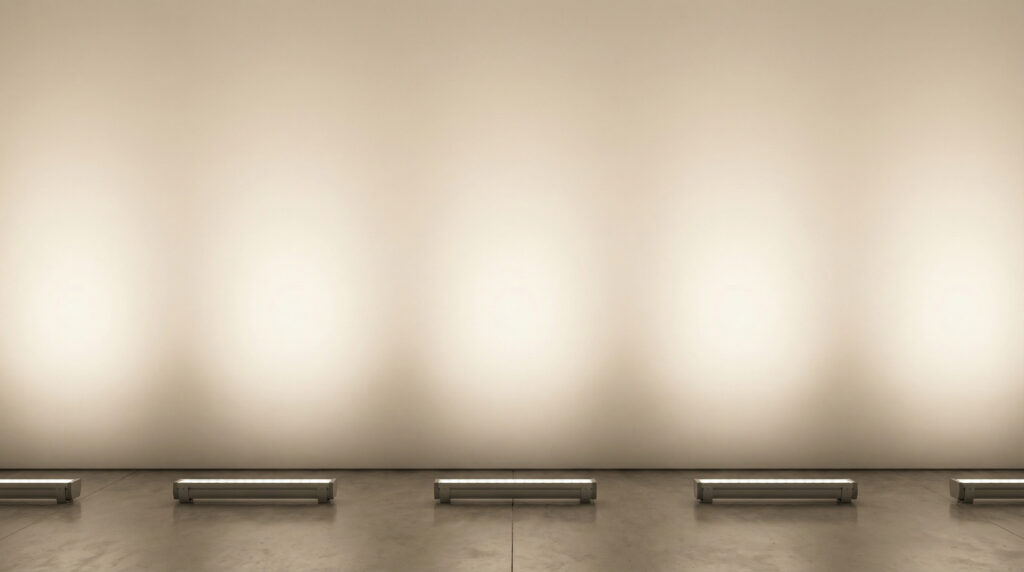
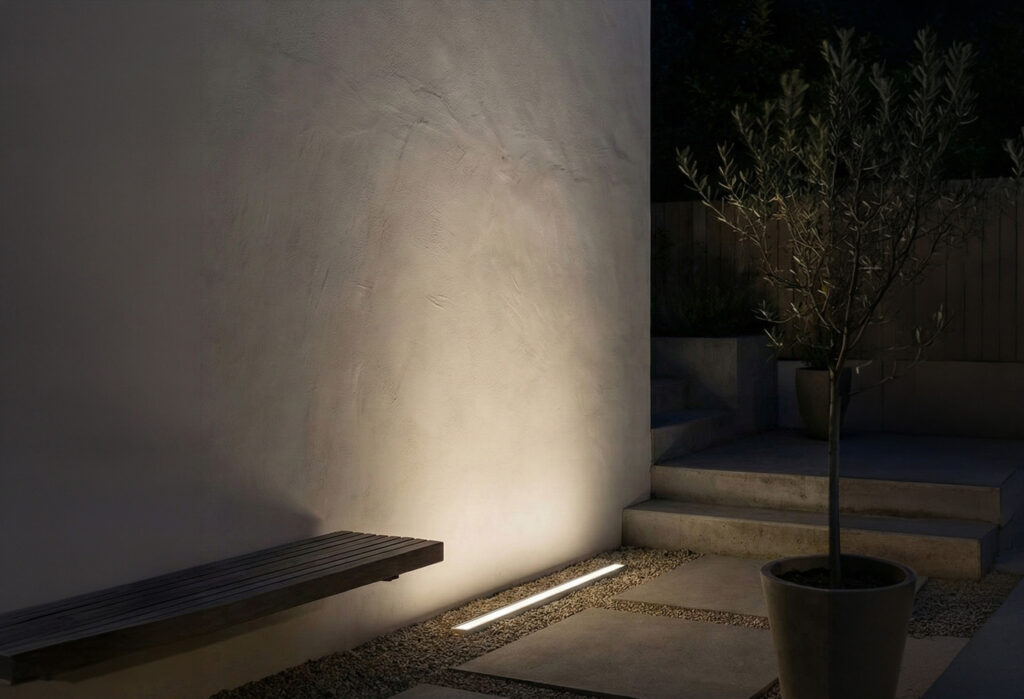
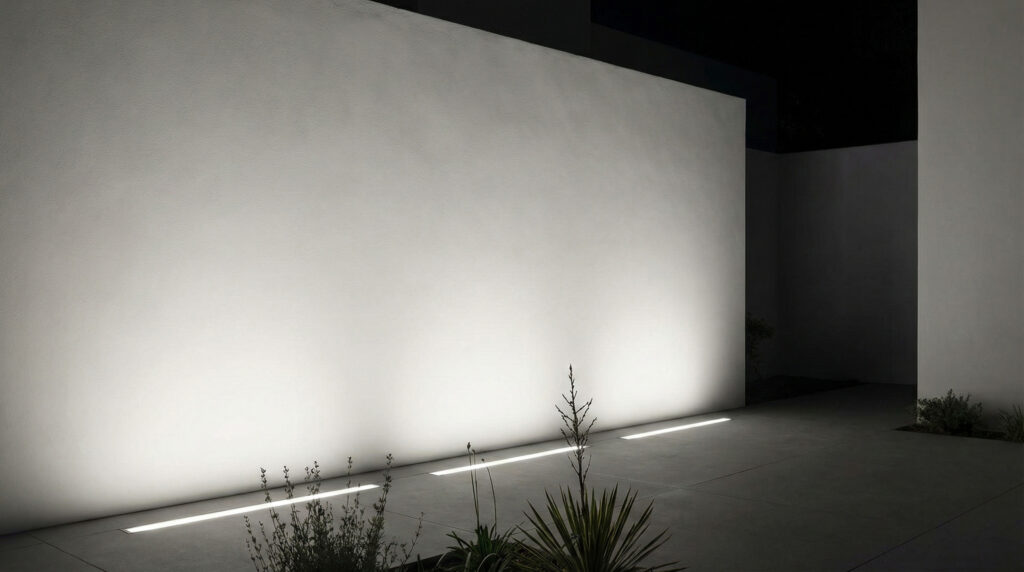
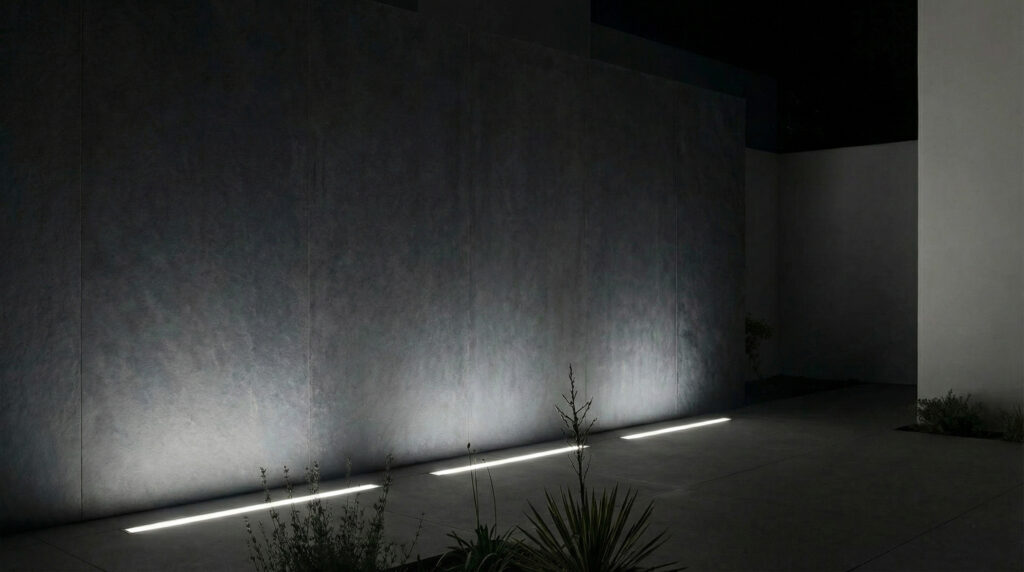
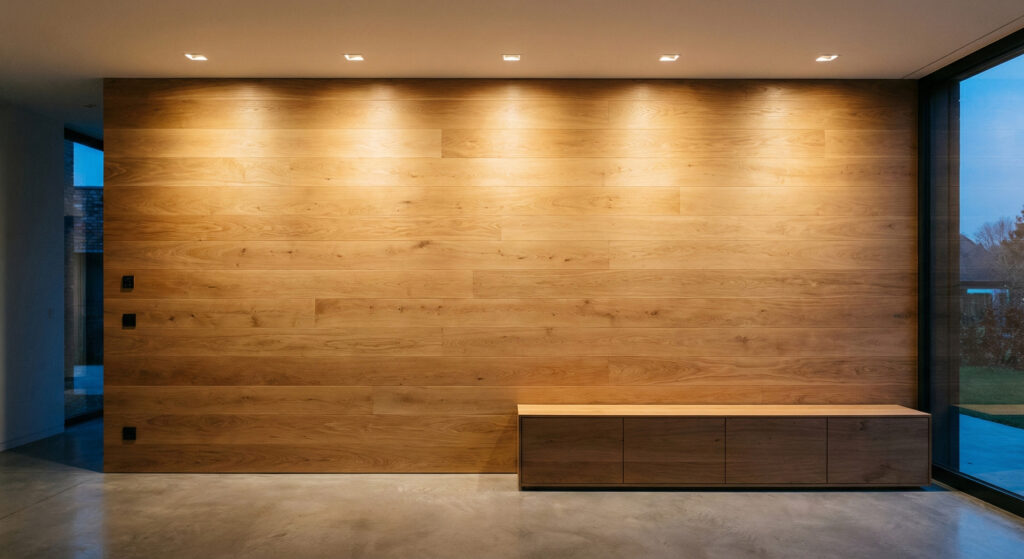
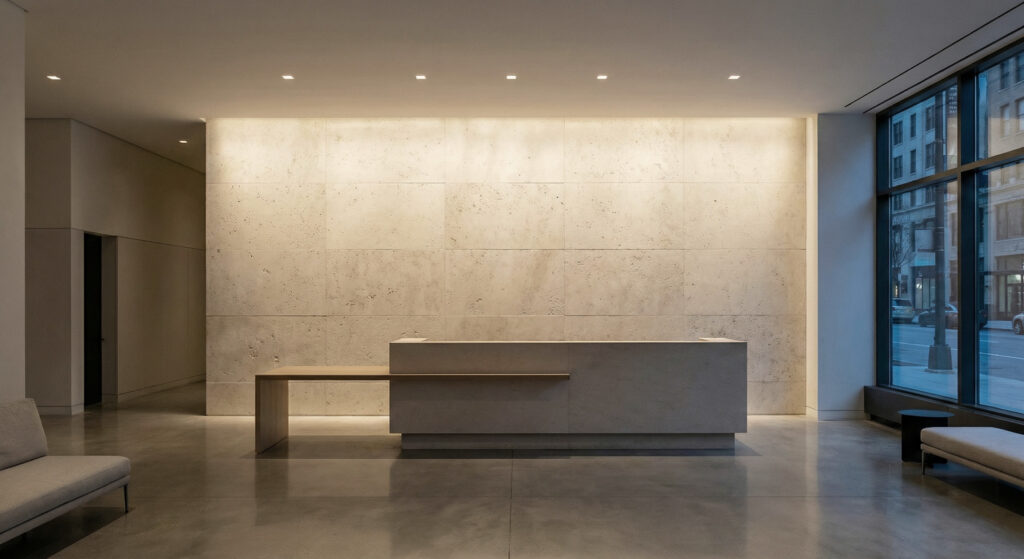
3.2 Wall Washer
Designed to uniformly "wash" the wall with light. It uses asymmetric optics that direct the beam exclusively toward the wall. It is mounted 30-80 cm from the wall (or recessed in the ceiling). Ideal for large, smooth surfaces — lobbies, galleries, waiting rooms.
- Linear: Long LED bars — the most efficient form of wall washing
- Compact: Individual points — more versatile but potential non-uniformity
- Recessed ceiling: Built into the ceiling — invisible, "clean" architecture
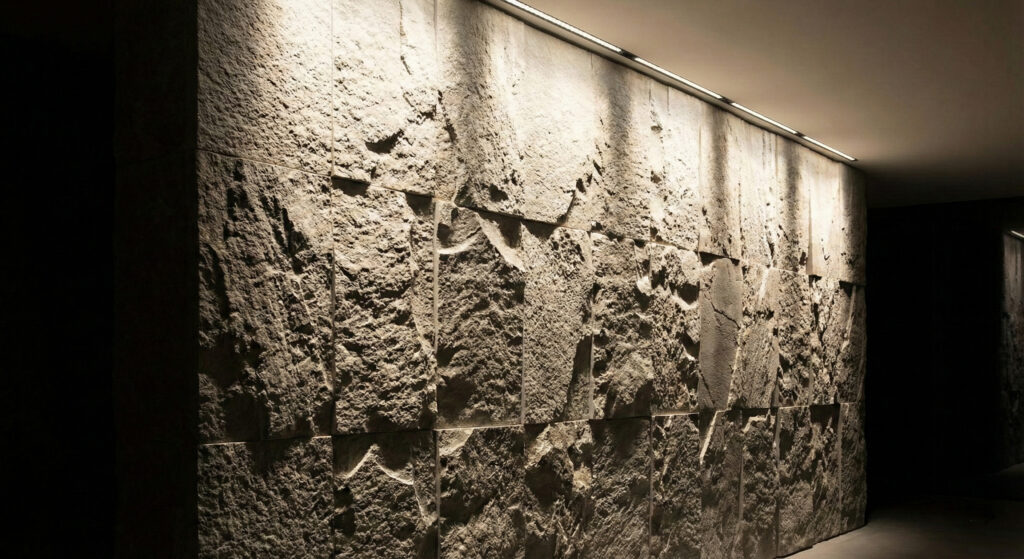
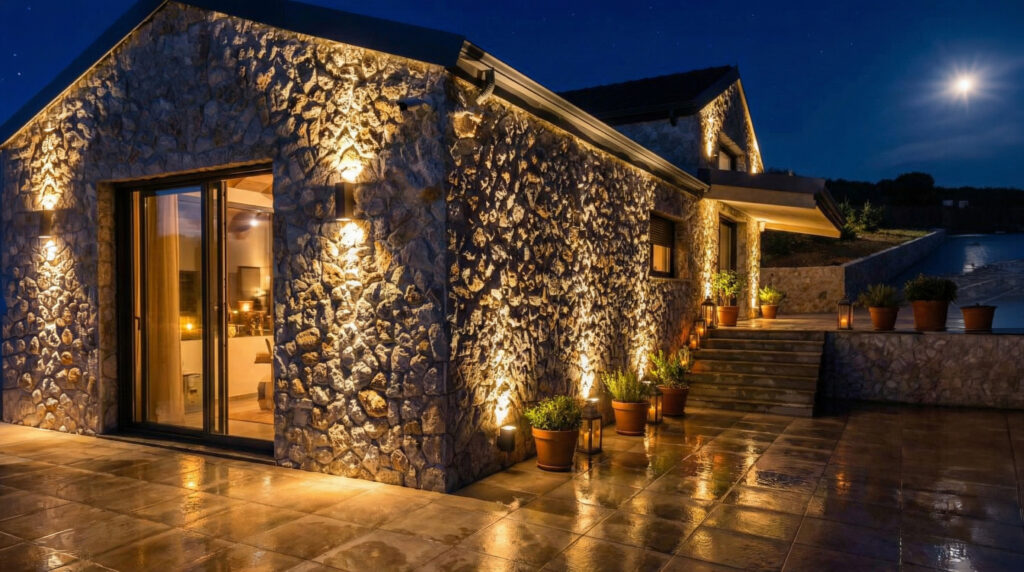
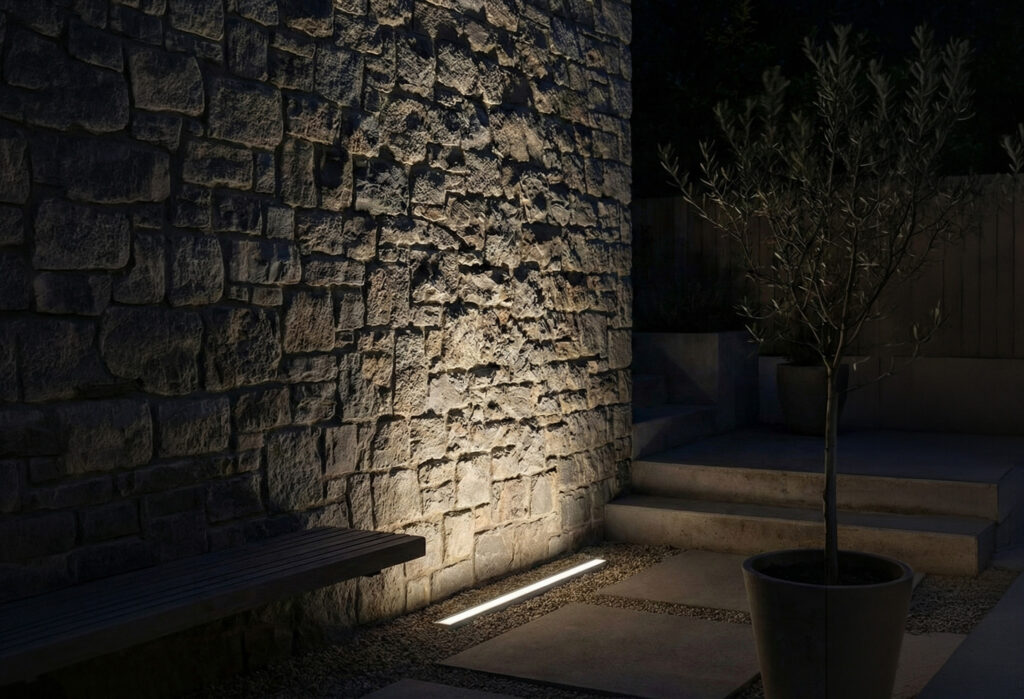
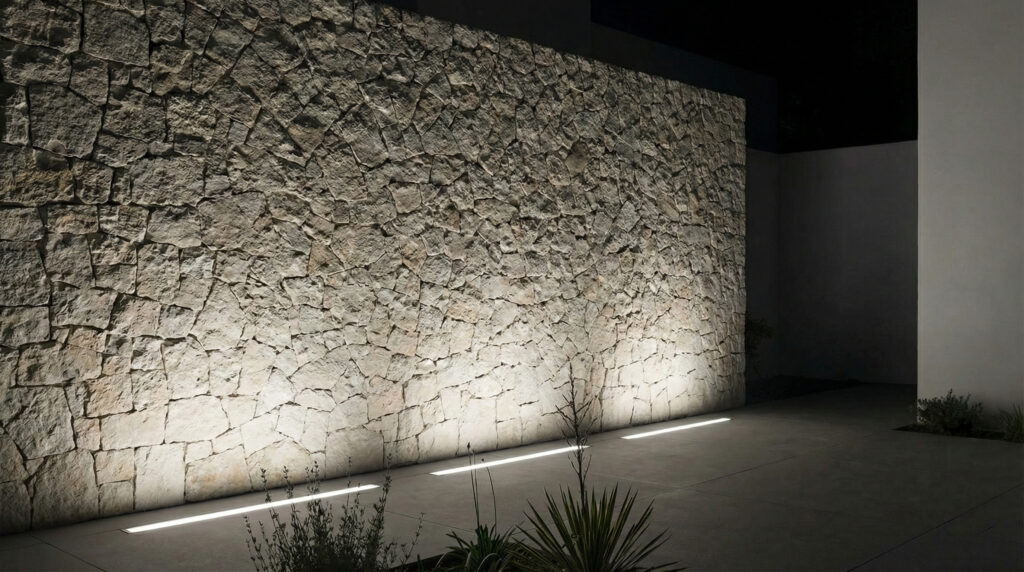
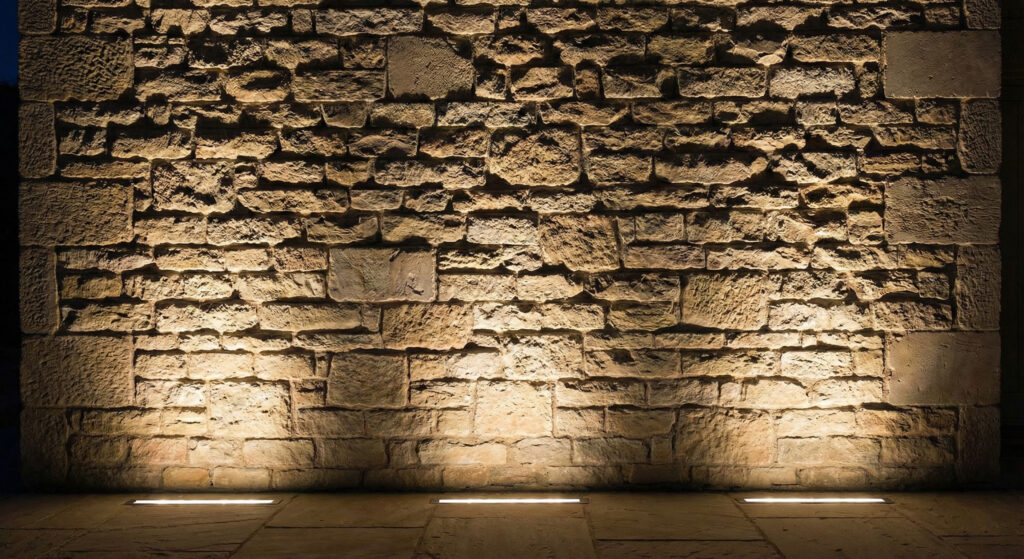
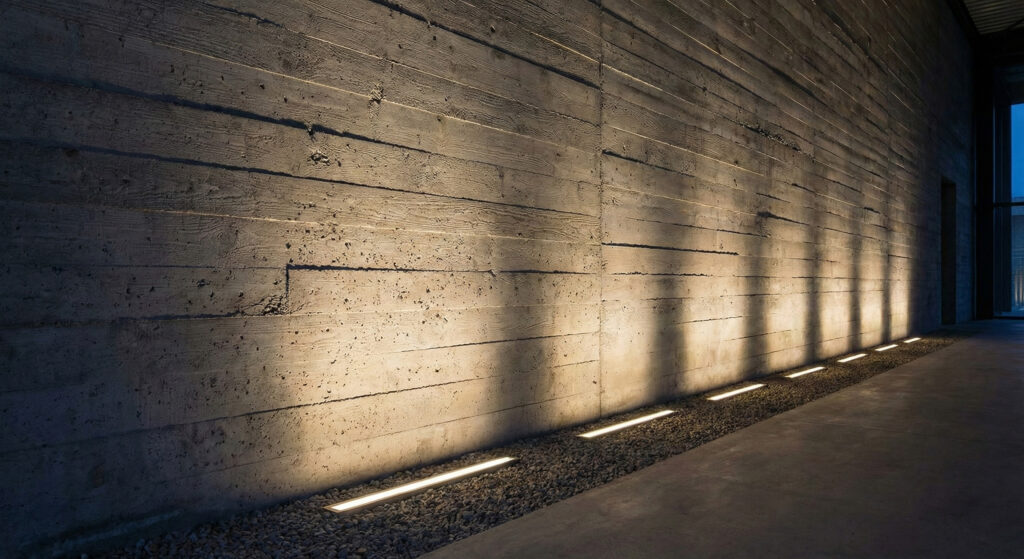
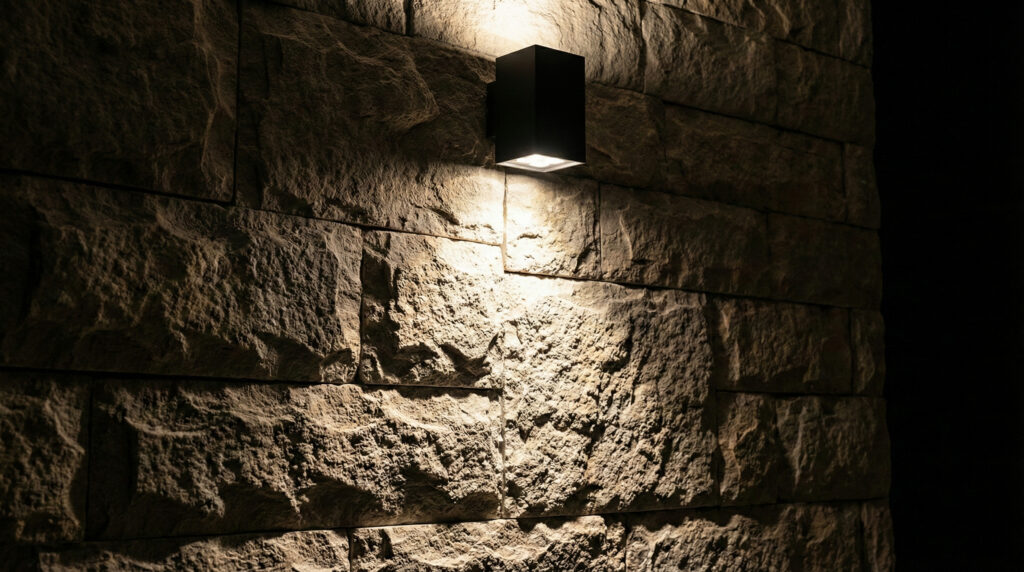
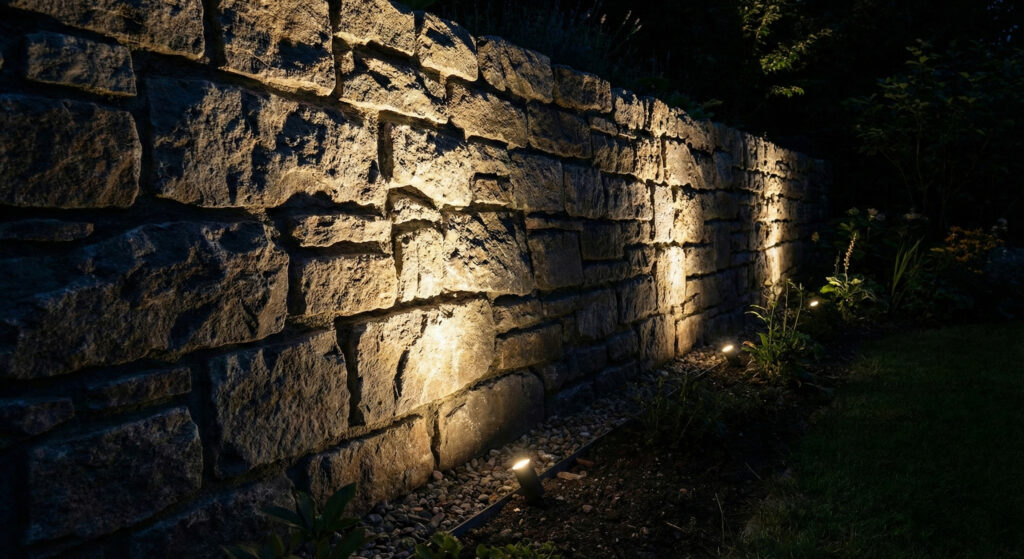
3.3 Wall Grazer
Mounted very close to the wall (5-20 cm) and directs the beam almost tangentially. It reveals every irregularity, joint, and texture. This is an advantage on stone, brick, concrete — but disastrous on smooth surfaces (reveals plaster imperfections, drywall screws, jointing compound seams).
Decision Tree: How do I choose the type?
Type comparison table
| Characteristic | Up/Down | Wall Washer | Wall Grazer |
|---|---|---|---|
| Uniformity | Medium | High | Low |
| Texture enhancement | Medium | Low | Very high |
| Shadows & Contrast | Medium | Minimal | Very strong |
| Rhythm on facade | Excellent | Subtle | Dramatic |
| Ideal material | Any smooth | Plaster, drywall | Stone, brick, concrete |
| Distance from wall | 0–20 cm | 30–80 cm | 5–20 cm |
| Typical beam angle | 12°–44° (symmetric) | Asymmetric | 5°–15° narrow |
| Typical use | Facades, entrances, corridors | Lobbies, galleries, halls | Feature walls, stone |
3.4 Decorative & Special-Purpose
Beyond the 3 basic types, there are specialized categories:
| Type | Description | Ideal for | Requirements |
|---|---|---|---|
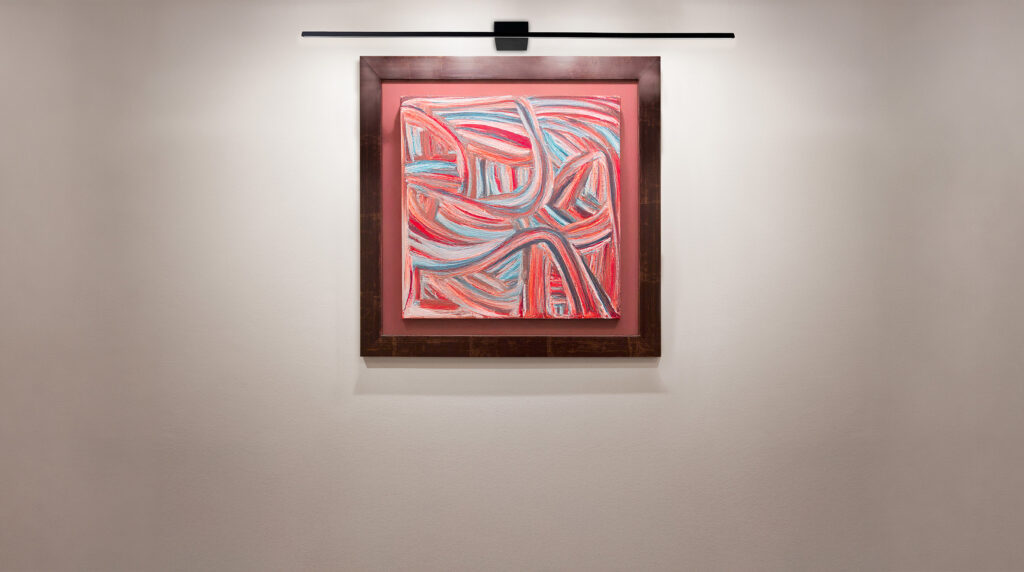
| Picture Lights | Asymmetric beam, CRI ≥95 | Paintings, galleries, art walls | CRI 95+, adjustable |
| Wall Recessed | Built into the wall | Stairs, wayfinding, corridors | Conduit before plastering, box |
| Backlit / Indirect | Soft halo around the body | Residences, hospitality, ambient | Smooth wall behind |
| Linear | Long LED bars | Large walls, efficient wash | Alignment, uniform power supply |
3.5 Wall Reflectance
The color and texture of the wall dramatically affect the result. The same lighting gives a completely different feel on a white vs dark wall:
| Wall Color | Reflectance | Result | What you need |
|---|---|---|---|
| White | ~80% | Uniform, maximizes lumens | Base power — nothing extra |
| Light gray / Beige | ~50–60% | Slightly reduced brightness | +20–30% power |
| Dark gray / Anthracite | ~15–20% | Dramatic, but "absorbs" light | 2–3× power vs white |
| Red stone | ~25–30% | Warm CCT + red = very warm | Sample test essential |
| Dark wood | ~10–15% | Very dramatic, almost only shadows | 3× power + narrow beam |
4. Placement Rules: Heights, Distances & Rules of Thumb
The right type of luminaire at the wrong height or distance gives poor results. This chapter contains the practical rules that lighting professionals apply — and that prevent 80% of common mistakes.
4.1 Mounting heights per application
The golden rule: the light source must be above or below the eye line (~1.60 m for a standing person). Never at the same height. Otherwise, the height depends on the application:
4.2 Table: Typical Heights & Distances
| Application | Height (h) | Spacing between | Note |
|---|---|---|---|
| Residential corridor | 1,60–1,80 m | 2,0–2,5 m | Above eye line |
| Exterior wall / Entrance | 1,80–2,20 m | 2,5–3,5 m | In relation to door — pair on either side |
| Hotel corridor | 1,60–1,80 m | 2,5–3,5 m | Rhythmic, alternating or same-side |
| Office | 1,80–2,00 m | 2,5–3,0 m | Avoid reflections on screens |
| Garden wayfinding | 0,40–0,80 m | 3,0–5,0 m | Low, does not blind passers-by |
| Garden wall / Facade | 1,80–2,20 m | 2,5–3,5 m | Rhythm & material highlighting |
| Architectural facade | 2,50–4,00 m+ | 3,0–5,0 m | Depends on building height & angle |
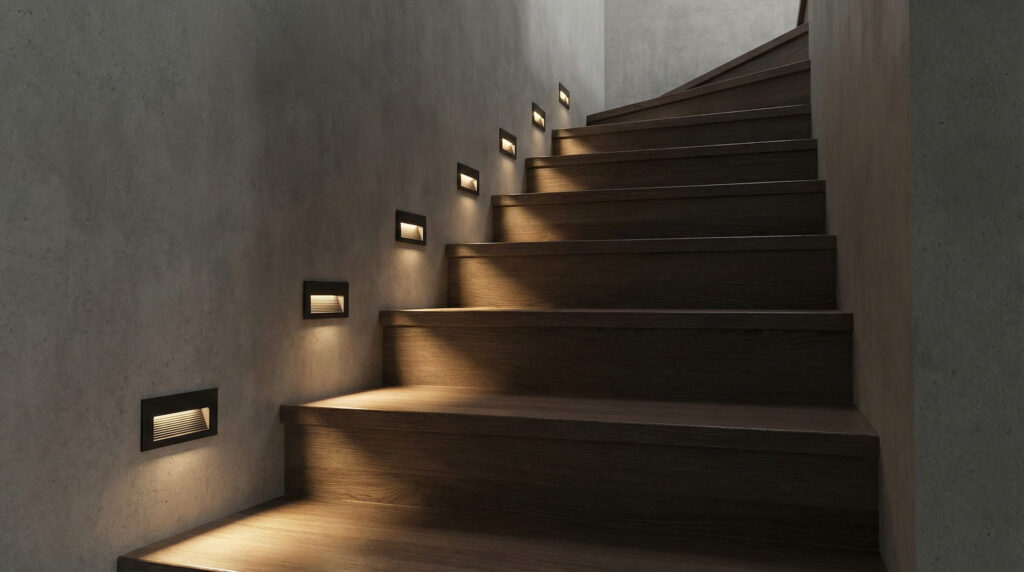
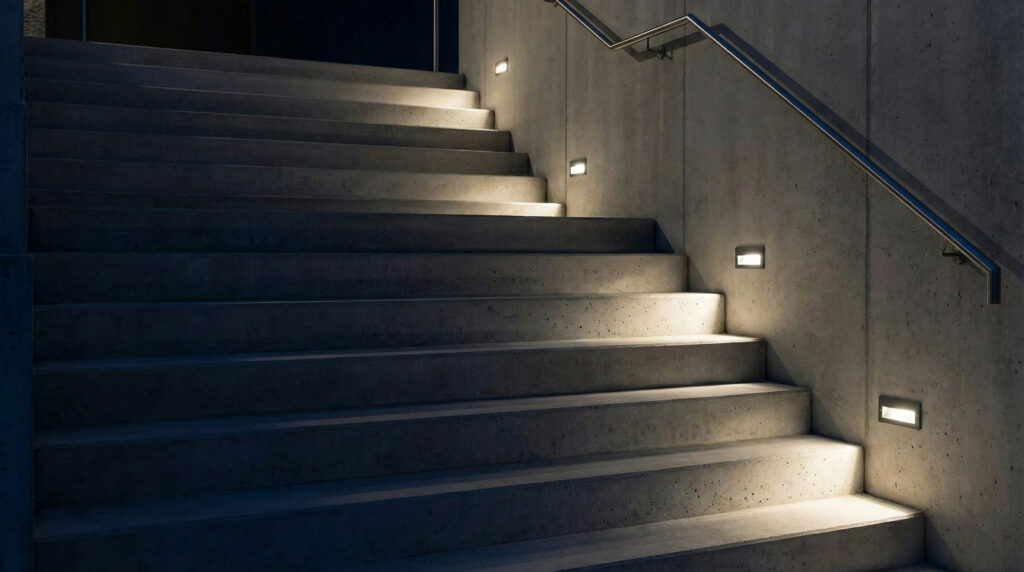
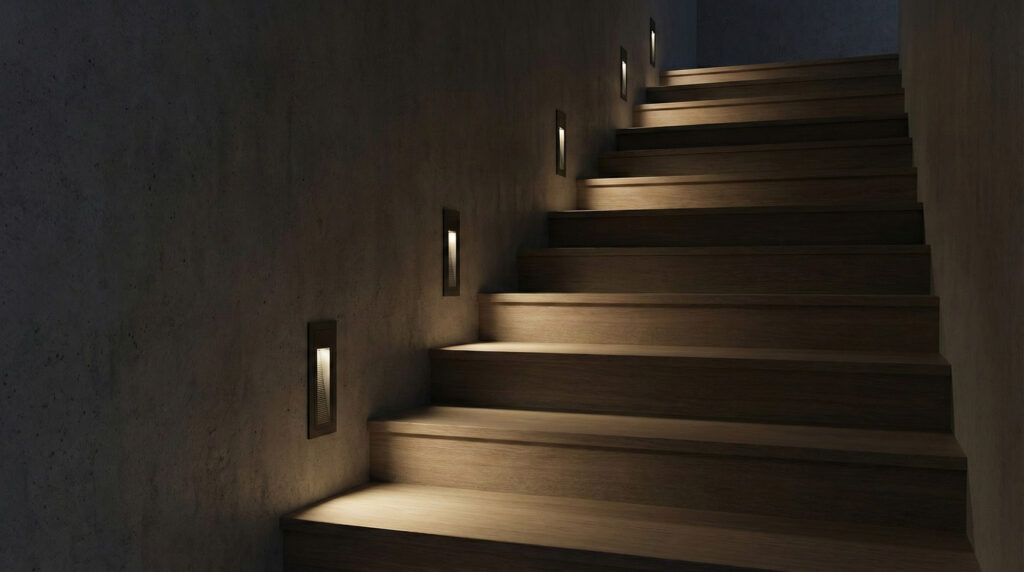
| Interior stairs (step lights) | 0,20–0,30 m | Every 3rd step | Recessed, low level |
| Interior stairs (wall mounted) | 0,80–1,20 m | Every 2nd–3rd step | Step lighting from above |
4.3 Rules of Thumb
These practical rules cover 90% of applications. They are a starting point — each project may require adjustment:
| Rule | Value | Explanation |
|---|---|---|
| Default interior height | 1,70 m centre | Safe height that does not cause glare — above eye line |
| Corridor spacing | 2,5–3,0 m between | Rhythm without "gaps" — if there are doors, align with them |
| On either side of door | ~30 cm | Classic entrance placement — aesthetically balanced |
| Linear washers | ~1/3 wall height from top | E.g. wall 3 m -> washer at 1 m from ceiling (=2 m from floor) |
| Step lights | Every 3rd step | Sufficient for wayfinding without excess |
| Max Up/Down spacing | ≤ 1.5x height h | If h=2 m -> max 3 m between. Otherwise "dark zones" |
| Min. corner distance | ≥15 cm from wall corner | Avoid "cut-off" beam at internal corners |
4.4 Special cases
Certain applications require adaptation of the general rules:
- High ceilings (>3 m): Raise the height proportionally — h=2,20–2,50 m. A stronger beam or narrower angle is needed.
- Sloped walls / roofs: The slope changes the angle of incidence — requires adjustable luminaires.
- Walls with recesses or protrusions: Every change in plane creates a shadow. Design each section separately.
- Doors & windows: Do not light above or below a glass pane — it creates reflections. Place on the side walls.
- Commercial spaces: In hotel corridors, align the luminaires with the room doors — not randomly.
5. Surface Materials & Interaction with Light
The wall is not a passive recipient of light — it is an active co-designer. The texture, reflectance and colour of the material determine whether you should use a washer, grazer or something entirely different.
5.1 Detailed materials table
| Material | Texture | Ideal lighting | CCT | Notes |
|---|---|---|---|---|
| Plaster / Drywall | Smooth | Wall Washer | Depends on use | Grazer reveals plastering imperfections — avoid |
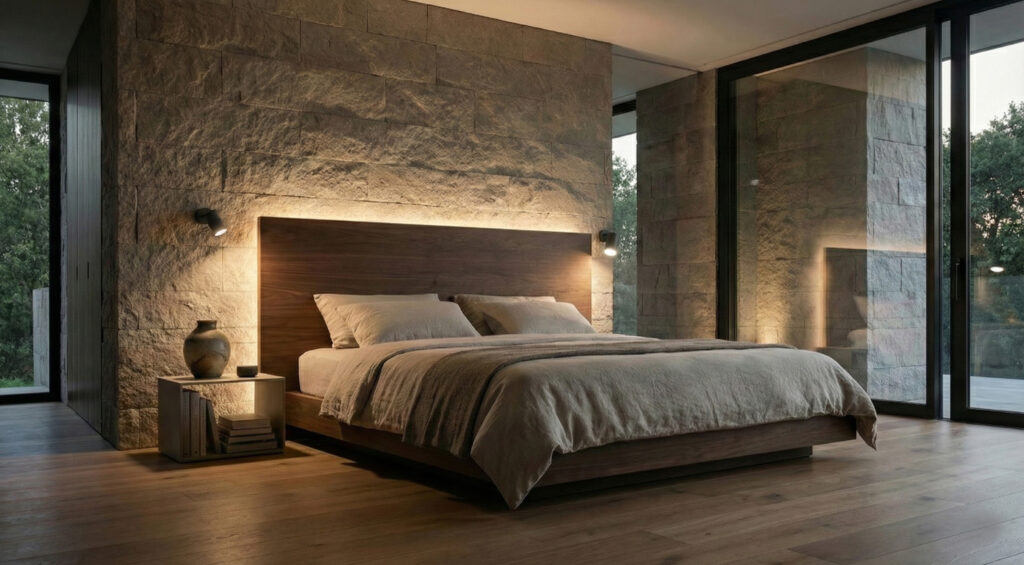
| Natural stone | Textured | Wall Grazer | 2700–3000K | Warm CCT highlights the hues — test on-site |
| Brick (exposed) | Textured | Wall Grazer | 2700–3000K | The joints create an impressive shadow pattern |
| Exposed concrete | Medium | Grazer or Washer | 3000–4000K | Grazer for industrial aesthetic, Washer for a "clean" look |
| Wood (dry) | Medium | Washer / Up-Down | 2700–3000K | Warm CCT enhances warmth — cool light "kills" wood |
| Metal (inox, corten) | Smooth/Polished | Washer / Up-Down | 3000–4000K | Watch for reflections — polished metal = glare |
| Glass / Marble | Smooth/Polished | Indirect / Backlit | 3000K | Tangential light = stains. Prefer backlight or indirect |
| Tile / Ceramic | Varies | Depends on texture | 3000K | Matte tile -> washer / Polished -> indirect |
5.2 Practical guide: How to check the wall
You do not need laboratory equipment. Two simple tests are enough:
Touch test
Touch the wall — if you feel irregularities, joints, roughness, the Grazer will highlight them. If it is perfectly smooth, choose a Washer.
Phone flashlight test
At night, place the phone flashlight in 2 positions: 5 cm from the wall (grazing) and 50 cm (washing). See which result you prefer. This 30-second test prevents mistakes costing thousands of euros.
6. CCT & CRI: Colour Temperature & Colour Rendering
Two numbers that completely change the feeling of a space: Colour Temperature (CCT, in Kelvin) determines whether the lighting "feels" warm or cool. The Colour Rendering Index (CRI) determines whether colours appear natural or "washed out".
6.1 Colour Temperature (CCT)
In architectural lighting, the choice of CCT is not only aesthetic — it affects the psychology of the space. Warm light (2700–3000K) creates intimacy, relaxation, luxury. Neutral (4000K) creates alertness, professionalism, clarity. Cool (5000K+) creates a sense of security but also a "clinical" atmosphere.
6.2 CRI: Colour Rendering Index
CRI (0–100) measures how naturally colours are rendered under a light source compared to natural light. Low CRI = "washed out" colours. High CRI = vivid, true. The difference is particularly noticeable on skin, wood, stone and fabrics.
| CRI | Quality | Suitable for | Cost |
|---|---|---|---|
| CRI 80 | Acceptable | Outdoors, gardens, industrial, parking | Basic |
| CRI 90 | Very good | Residences, hospitality, retail, lobbies | +10–15% |
| CRI 95+ | Excellent | Galleries, museums, premium retail, fine dining | +25–40% |
| CRI 97+ | Top-tier | Photography studios, conservation, art | +50–80% |
6.3 CCT x CRI table per application
| Application | CCT | Min. CRI | Ideal CRI | Note |
|---|---|---|---|---|
| Bedroom | 2700K | 80 | 90+ | Dimming essential — "night" scene at 10% |
| Living room | 2700–3000K | 80 | 90+ | Layering: ambient + wall + accent |
| Bathroom | 3000K | 90 | 95+ | Correct skin rendering at the mirror |
| Hotel lobby | 2700–3000K | 80 | 90+ | Warm = welcoming, luxurious |
| Restaurant | 2200–2700K | 80 | 90+ | Very warm = intimate, flattering skin |
| Garden / Outdoor | 2700–3000K | 80 | 80+ | CRI less critical outdoors |
| Office | 3000–4000K | 80 | 80+ | EN 12464 requires ≥80 — 4000K for alertness |
| Gallery / Museum | 2700–4000K | 90 | 95+ | Depends on exhibit — painting requires 95+ |
| Retail | 3000–4000K | 80 | 90+ | CRI 90+ highlights merchandise colours |
7. Applications per Space Type
Each space has different requirements — brightness, temperature, IP, dimming, CRI. This chapter provides specific recipes per application, with examples, tables and product recommendations.
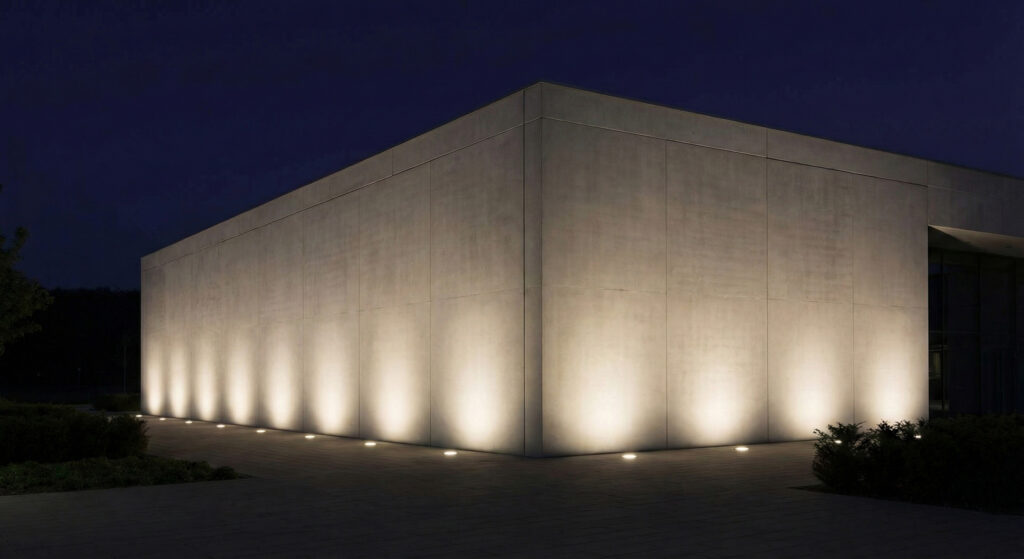
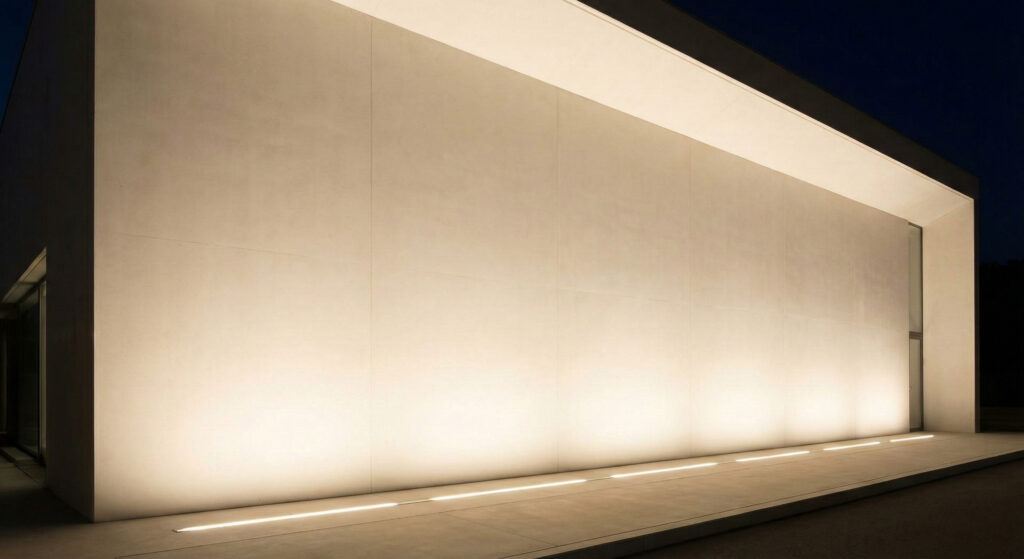
7.1 Architectural Facades & Elevations
Lighting architectural surfaces aims at highlighting form — materials, volumes, geometry — at night. Design in zones: base -> main body -> crown -> entrance. Each zone can have a different type, intensity or angle.
| Facade zone | Lighting type | Purpose |
|---|---|---|
| Base (0–1 m) | Grazer or Up-only | Material highlighting, building "weight" |
| Main body (1–3 m) | Rhythmic Up/Down | Rhythm, geometry, identity |
| Crown (>3 m) | Up-only or narrow beam | Completion, building "termination" |
| Entrance | Up/Down pair + accent | Welcome, security, wayfinding |

TECHLUMEN for Architectural Facades
- CALTO-60-S2 — Up/Down, IP66, IK09, 12°–84°, CRI 80/90
- CALTO-100-S2 — Up/Down, IP66, 12°–86° + adjustable, CRI 80/90/97, 27W
- QUADRO-W-S2 — Up/Down, IP66, IK09, 5°–44°, DALI
- BILUX — Up/Down cylindrical, IP65, 12°–50°
- GLIM series — Linear, IP66/67, wallwashing, up to 23.400 lm
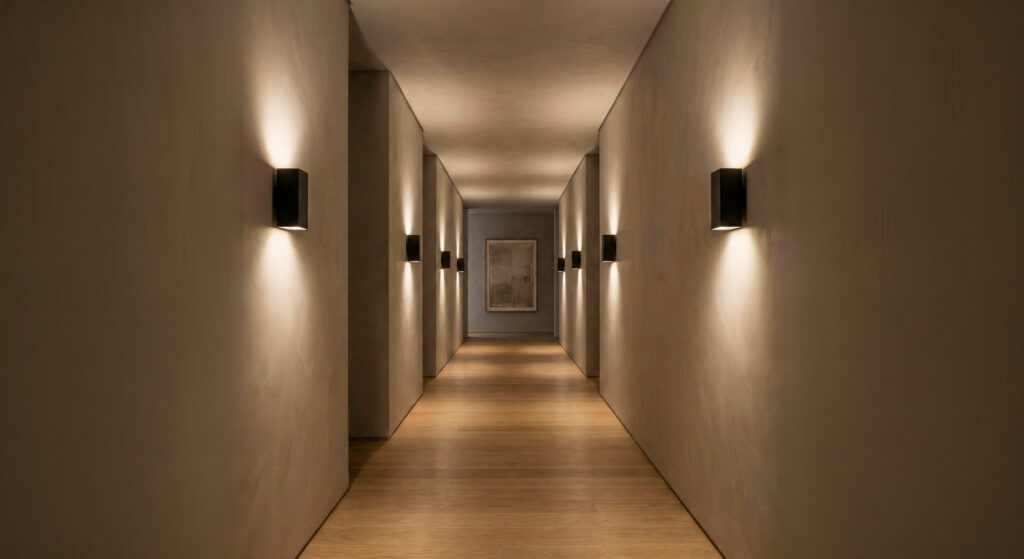
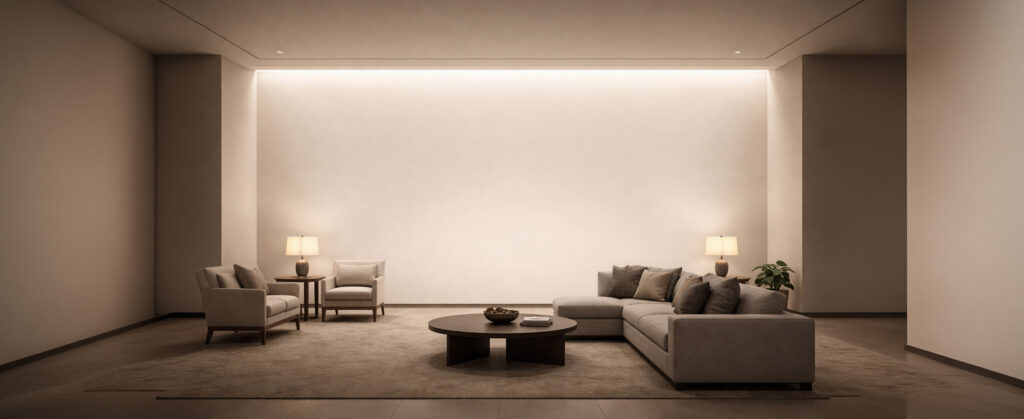
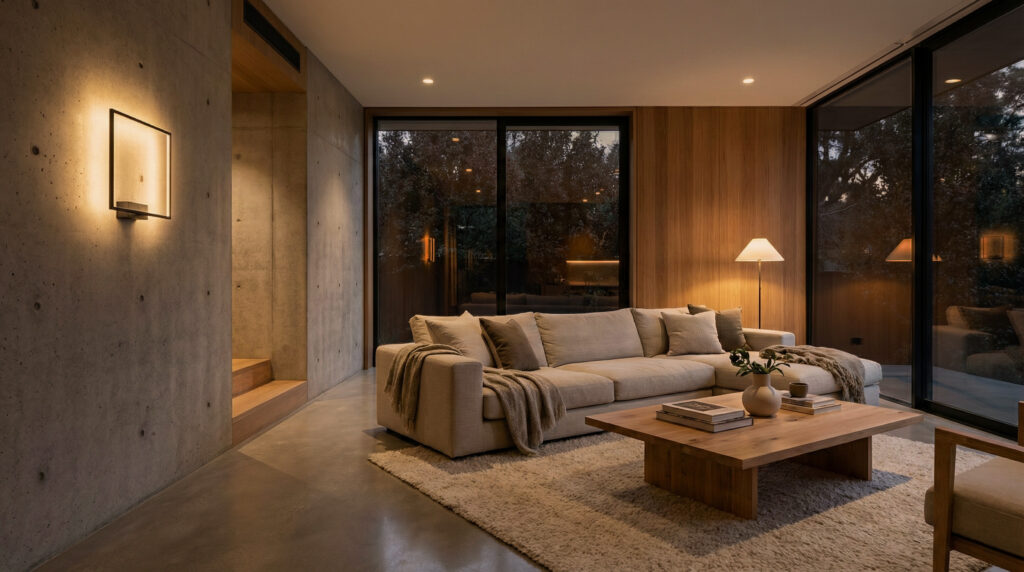
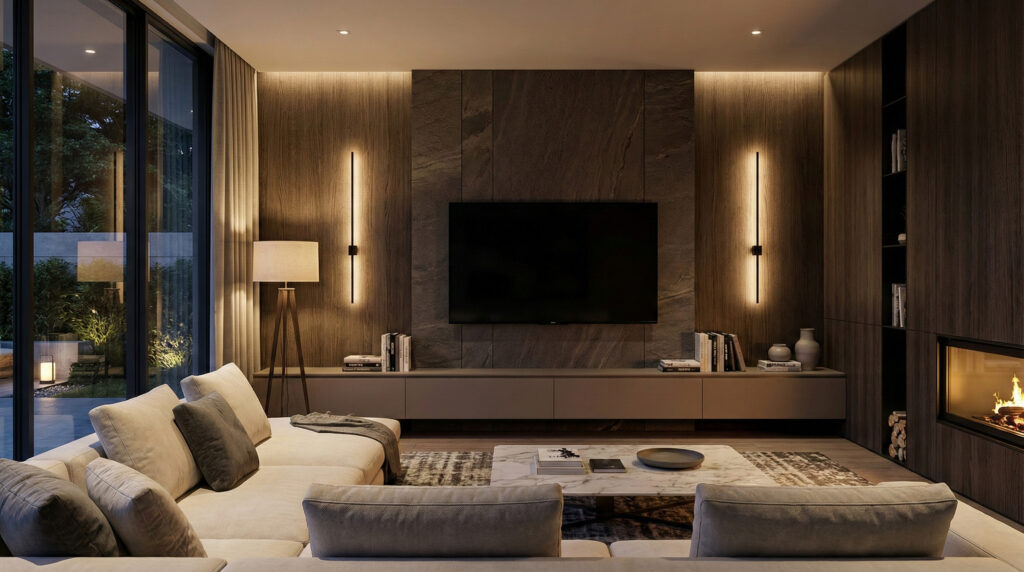
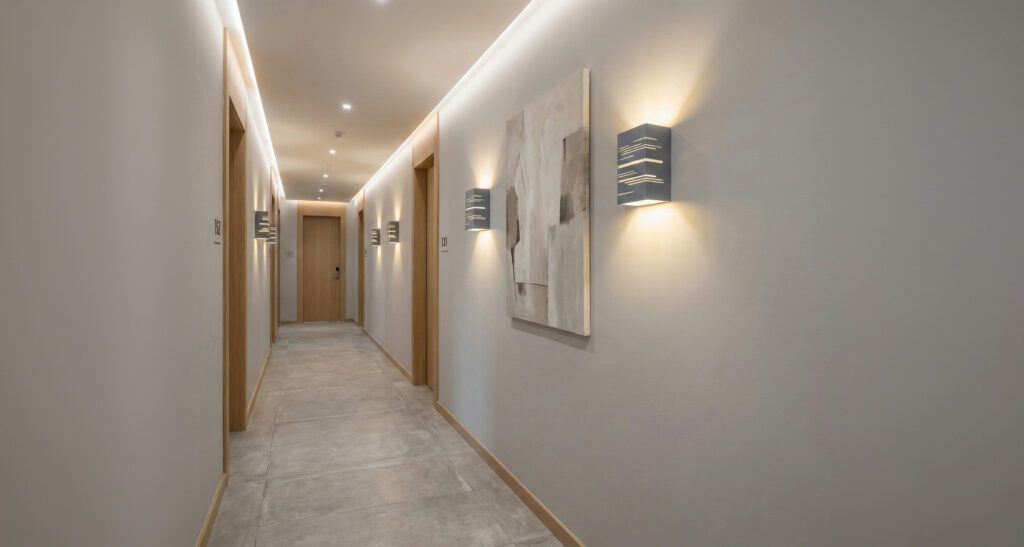
7.2 Residences
Wall lighting creates atmosphere, guidance, aesthetics. Key applications: corridors, staircases, living rooms, bedrooms, entrances, exterior walls. Dimming is essential — "day" vs "evening" vs "night" scene.
| Residential space | Type | CCT | Height | Note |
|---|---|---|---|---|
| Corridor | Up/Down compact | 2700K | 1,70 m | Every 2,5 m, night dimming 10% |
| Staircase | Step light + Up/Down | 2700K | 0,20 + 1,70 m | Step lights every 3rd step |
| Living room | Up/Down or Backlit | 2700K | 1,70–2,00 m | On either side of TV wall or feature |
| Bedroom | Indirect / Backlit | 2700K | 1,20–1,50 m | Lower, reading position |
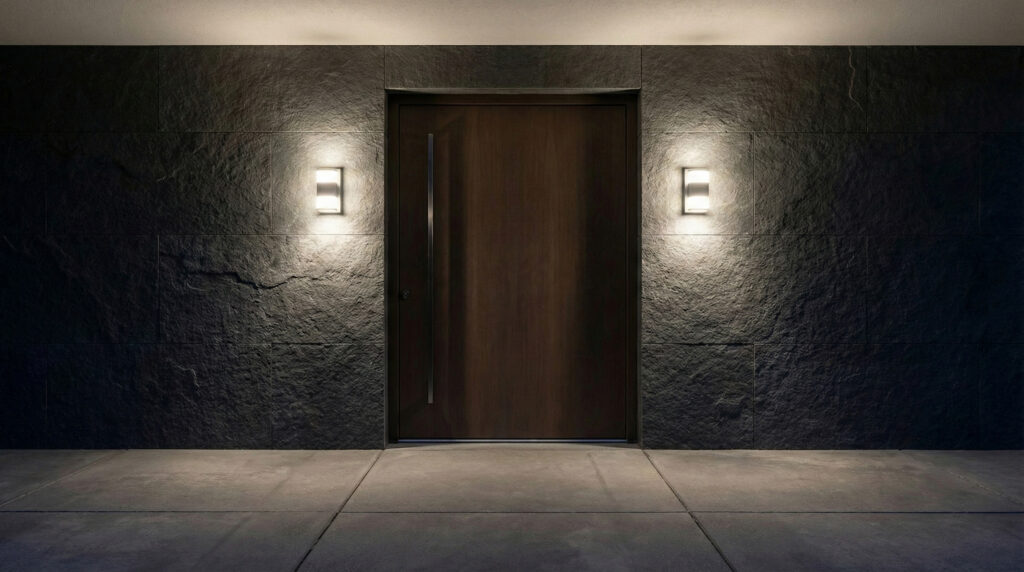
| Exterior entrance | Up/Down IP65 | 3000K | 2,00 m | Pair on either side, sensor |
TECHLUMEN for Residences
- UP — 9–16W, Tunable CCT, DALI/0-10V/Bluetooth
- WALLY — Slim, DALI/Tunable, Emergency 1h/3h
- ALBA-40/80 — Panel wall wash, 6–20W, 2700K–5000K
- ROI-W — Elegant with stripes, soft lighting
- CONTORNO-W — CRI >95, halo effect
- ARTIFILO/MIROFILO — Picture lights, CRI 95
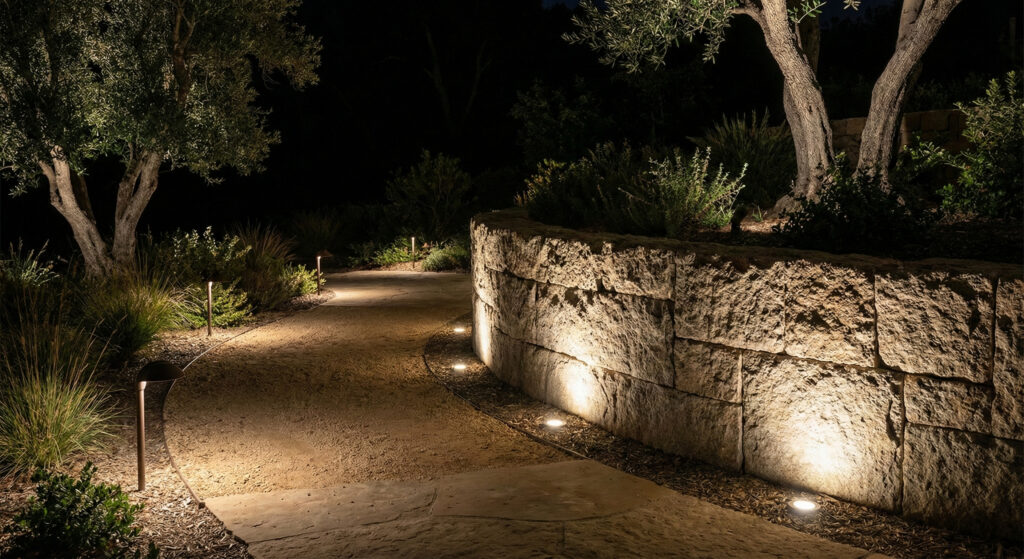
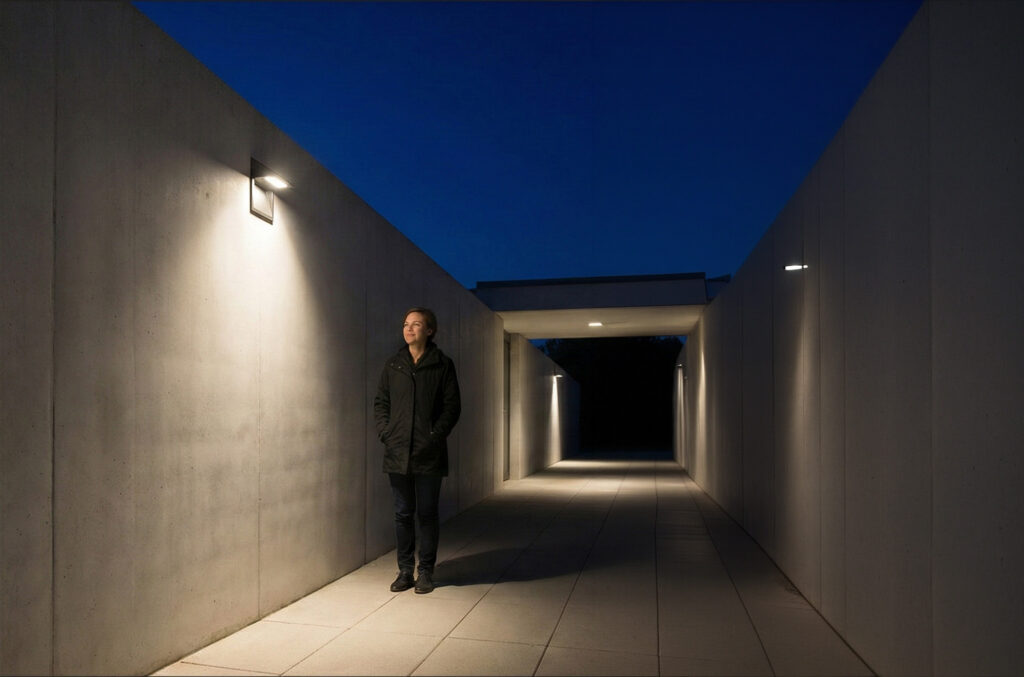
7.3 Outdoor Spaces & Gardens
Three goals: safety, orientation, aesthetics. Requirements: IP ≥65, CCT 2700K–3000K, proper optics against light pollution (cut-off, shielded). Light pollution is not only an environmental issue — in many municipalities there are regulations.
| Garden application | Type | Height | IP | Note |
|---|---|---|---|---|
| Stone-built wall | Grazer | Ground or h=0,50 m | IP66 | 12°–15°, 15 cm from wall |
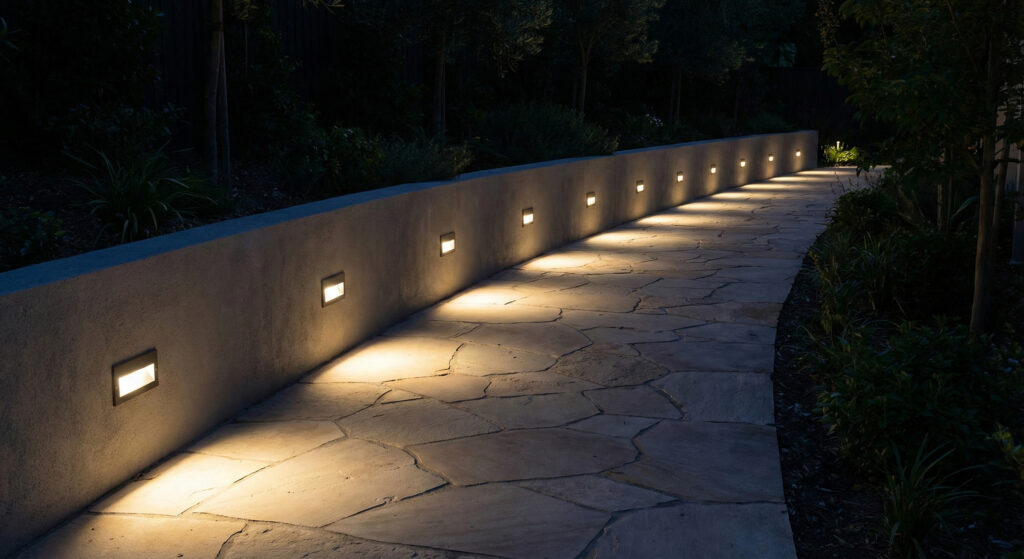
| Wayfinding path | Step light / bollard | 0,40–0,80 m | IP65 | Every 3–5 m, low intensity |
| Perimeter wall | Up/Down | 1,80–2,20 m | IP65 | Rhythmic, security + aesthetics |
| Pool / near water | Sealed fixture | Varies | IP67–68 | Inox 316L, extra resistance to chlorine |
TECHLUMEN for Outdoors
- CALTO-60/100-S1/S2 — IP66, IK09, 12°–84°
- BILUX — IP65, Up/Down, elegant
- QUADRO-W-S2 — IP66, IK09, 5°–44°
- CRYPTO — Wall recessed, DALI/Bluetooth
7.4 Hotels & Hospitality
Lighting as part of the hospitality experience. In hotels, lighting is not a technical issue — it is part of the brand. Corridors: rhythmic placement, 2700K–3000K, DALI, emergency. Rooms: 2700K, dimming, CRI ≥90. Lobbies: layering, focal points, atmosphere.
| Hotel space | Type | CCT | Dimming | Special |
|---|---|---|---|---|
| Corridor | Up/Down compact | 2700K | DALI + scenes | Emergency every 3rd, alternating |
| Room | Indirect / Backlit | 2700K | Bedside switch | CRI ≥90, reading mode |
| Lobby | Wall wash + accent | 2700–3000K | DALI zones | Feature wall, art lighting |
| Restaurant/Bar | Indirect + accent | 2200–2700K | DALI scenes | Very warm, intimate |
| Exterior | Up/Down IP65+ | 3000K | Timer/sensor | Rhythmic facade, security |
TECHLUMEN for Hospitality
- WALLY — Snap-fit, DALI, Emergency 1h/3h
- UP — Tunable CCT, DALI
- AXIS/AXIS-2 — Backlit ambient, CRI 95
- NODO — Fabric-covered, boutique hotels
7.5 Safety & Wayfinding
In safety: uniformity > intensity. A little light everywhere is better than a lot of light somewhere and darkness elsewhere. Low placement (0,20–1,20 m), optical cut-off, emergency function. In staircases, step lighting reduces accidents by ~70% (hotel chain statistics).
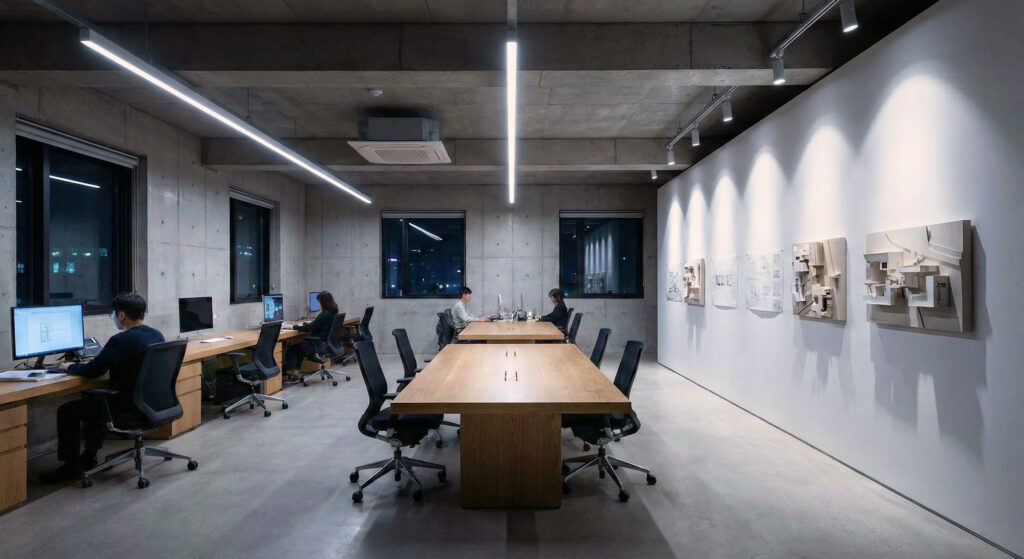
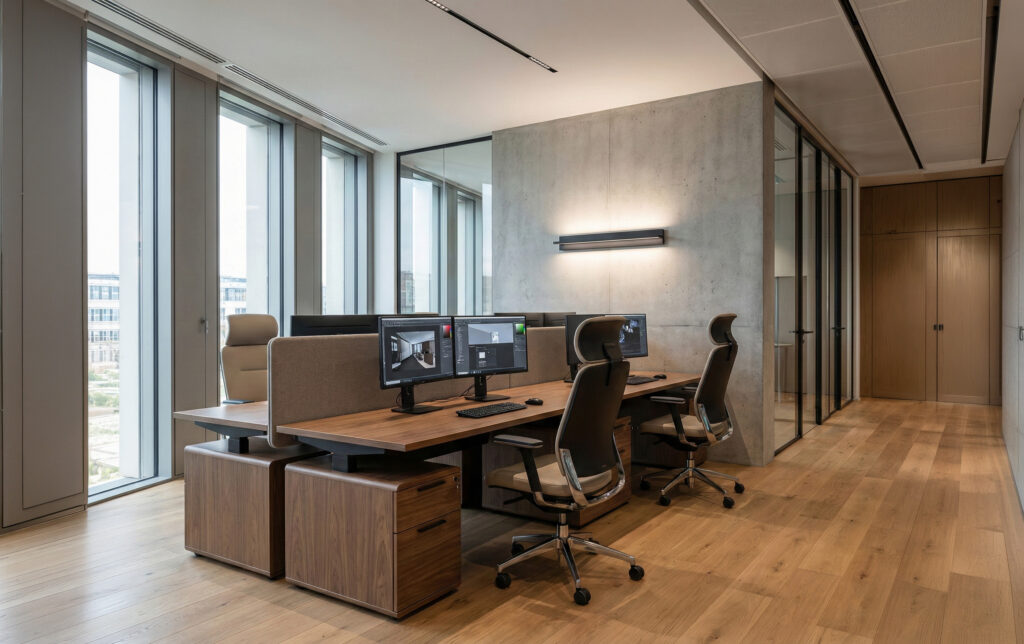
7.6 Offices & Professional Spaces
In offices, wall lighting complements the general lighting: it reduces luminance contrasts (luminance ratios), improves visual comfort on screens, and enhances professionalism. According to EN 12464-1, vertical illuminance must be ≥50 lux at 1.2 m in work areas.
TECHLUMEN for Offices
- ALBA-40/80 — Panel wall wash, DALI
- PARATO — Linear, CRI >95, DALI/Emergency
- PI — 400–2100 mm, DALI, IP66 version
- THIN-P — Trimless linear, CRI 95
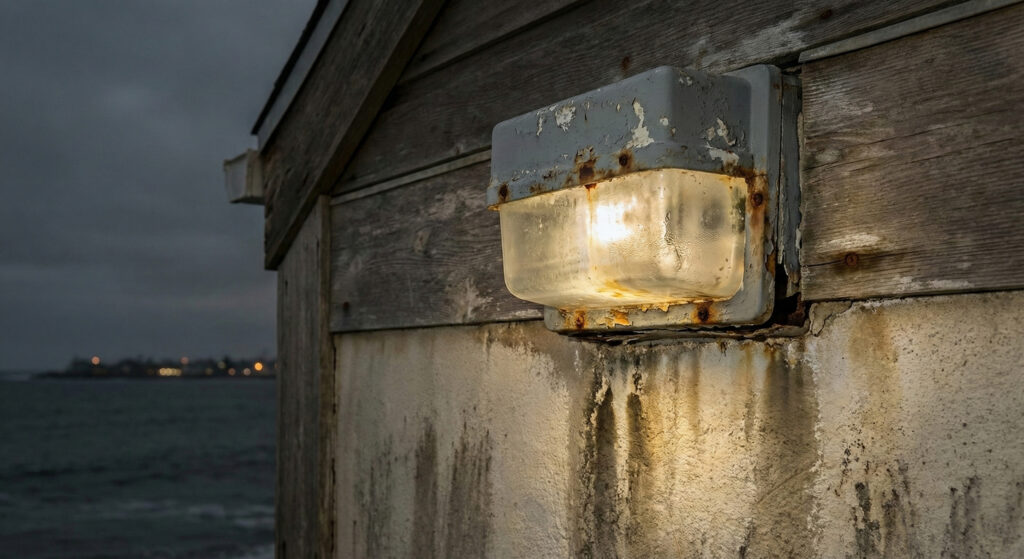
8. IP/IK & Resistance to External Conditions
IP and IK ratings are not "marketing" — they are critical technical specifications that determine whether the luminaire will withstand its environment. Wrong IP = failure in months. Correct IP = decades of operation.
8.1 What IP & IK Mean
IP (Ingress Protection) — two digits: the 1st = dust protection (0–6), the 2nd = water protection (0–9). E.g. IP65 = full dust + water jets. IK (Impact Protection) — resistance to mechanical impacts (00–10). E.g. IK09 = resistance to 10 kg from 20 cm = 10 Joules.
8.2 Detailed IP/IK Table
| Environment | IP | IK | Body Material | Examples |
|---|---|---|---|---|
| Indoor dry (living room, corridor) | IP20–IP33 | — | Aluminium, plastic | Residences, hotel interiors |
| Indoor wet (bathroom, kitchen) | IP44–IP54 | IK05+ | Aluminium | Bathroom Zone 2, indoor SPA |
| Sheltered outdoor | IP54–IP65 | IK07+ | Aluminium powder coated | Verandas, arcades, pilotis |
| Exposed outdoor | IP65–IP66 | IK08+ | AL die-cast + silicone gasket | Facades, gardens, parking |
| Coastal / Island | IP67–IP68 | IK10 | Inox 316L or marine grade AL | Seafront, pools, near the sea |
| Industrial / Public | IP65–IP66 | IK10 | Die-cast AL, anti-vandal | Parking, schools, parks |
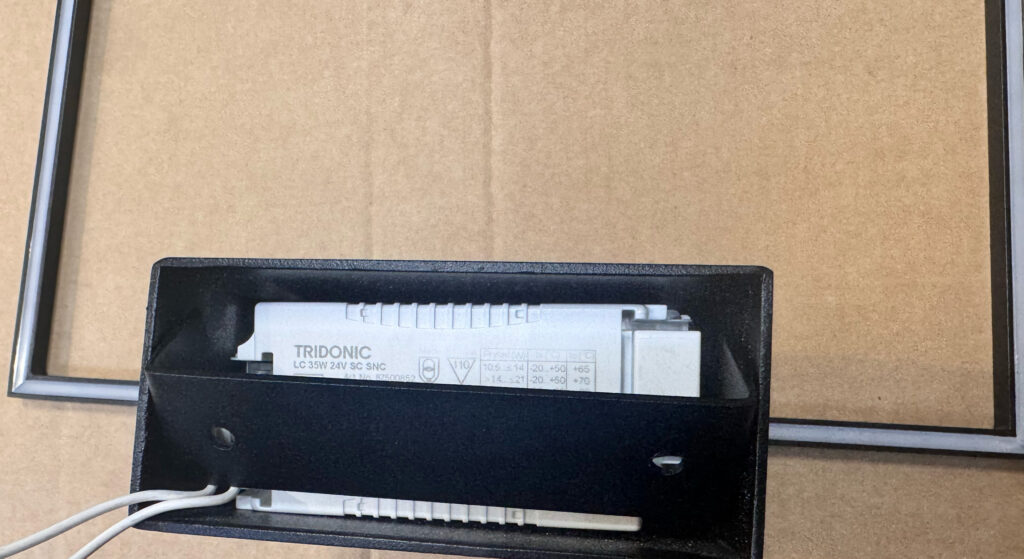
9. Reliability: Driver, Flicker-Free, Surge Protection
The driver (power supply) is usually the first point of failure — not the LEDs. An LED can last 100,000+ hours, but a bad driver will die in 15,000. Driver quality, surge protection and the absence of flicker are the "invisible" characteristics that make the difference.
| Characteristic | What It Means | Minimum | Ideal | Why It Matters |
|---|---|---|---|---|
| Driver brand | Power supply manufacturer | Known (Osram, Meanwell, TCI) | Osram, Tridonic, Inventronics | Branded = spare parts, reliability, warranty |
| Lifetime | L70B10 in hours | >50,000h | >100,000h | L70 = 70% luminous flux, B10 = max 10% failure |
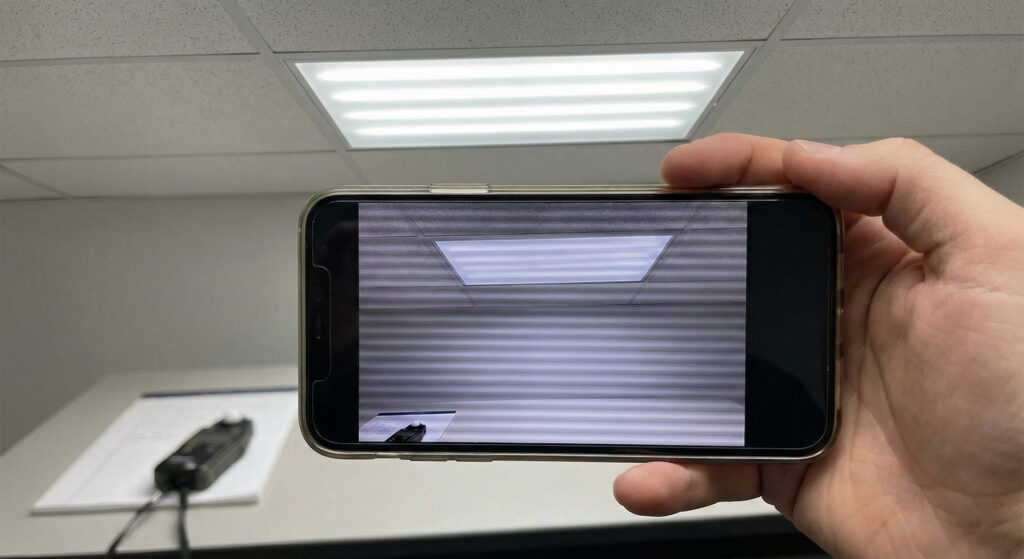
| Flicker-free | Elimination of flickering | <3% flicker | <1%, IEEE 1789 | Flicker → fatigue, headache, stress |
| Surge protection | Resistance to voltage surges | 2 kV | 4–6 kV + external SPD | Lightning, fluctuations — critical on islands |
| lm/W | Luminous efficacy | 80 lm/W | 120–180 lm/W | Higher = fewer W, less heat |
| Tc (driver temp) | Maximum driver temperature | — | Tc point < 85°C | Overheating = premature driver failure |
10. Common Mistakes & Troubleshooting
Most problems are caused by wrong selections or installation, not bad luminaires. This table covers the 9 most common mistakes — if you learn to recognize them, you will avoid them.
| Symptom | Cause | Solution |
|---|---|---|
| Spots (scalloping) | Narrow beam or wrong type | Wider beam / Washer instead of Grazer |
| Visible LED — glare | Wrong height / no cut-off | Higher ≥1.80 m / cut-off luminaire |
| Dark zones | Large spacing between fixtures | Reduce to ≤1.5x h |
| "Dirty" wall | Grazer on smooth surface + imperfections | Washer / correct surface before installation |
| "Clinical" feel | CCT >5000K in residential | Reduce to 2700K–3000K |
| Light pollution | Uplight without target | Narrow beam + full cut-off |
| Flicker | Bad driver / dimmer incompatibility | Replace driver / compatible dimmer |
| Premature outdoor failure | Insufficient IP or poor sealing | IP≥65 + reliable manufacturer |
| Screen reflections | Luminaire opposite screen | Behind or to the side, never opposite |

11. Procurement Specifications Checklist
Before ordering, make sure you have answered all of the following. This checklist prevents ordering mistakes — replacement after installation = 3–5x cost.
| Item | Question | Example |
|---|---|---|
| Type | Up/Down, Washer, Grazer, Decorative? | Up/Down |
| IP Rating | Indoor, outdoor, coastal? | IP66 |
| IK Rating | Mechanical stress? | IK09 |
| CCT | Warm, neutral, cool? | 3000K |
| CRI | What colours does it render? | CRI ≥90 |
| Beam | Narrow, wide, wallwashing? | 24° |
| Power / Lumens | How much light? | 9W / 1,500 lm |
| Dimming | DALI, 0-10V, Bluetooth? | DALI |
| Emergency | Backup operation? | Em 3h |
| Material / Colour | RAL, body? | AL, RAL 9005 |
| Dimensions | Do they fit the space? | 60×60×200 mm |
| Warranty | How many years? | 5 years |
| Lifetime | L70B10? | >100,000h |
| Spare parts | Available driver/LED module? | Yes, 10+ years |
12. Installation Checklist
Proper installation is equally important as proper selection. Follow these 7 steps in the correct order:
Electrical Preparation
Conduit, junction boxes, correct supply. Before plastering — any change after = chiselling. Plan conduit for DALI even if you initially use simpler dimming.
Mounting Check
Wall strength, anchors (plasterboard: toggler/molly — plain plastic anchors cannot hold >3-4 kg). On stone: appropriate drill bit + heavy-duty anchor.
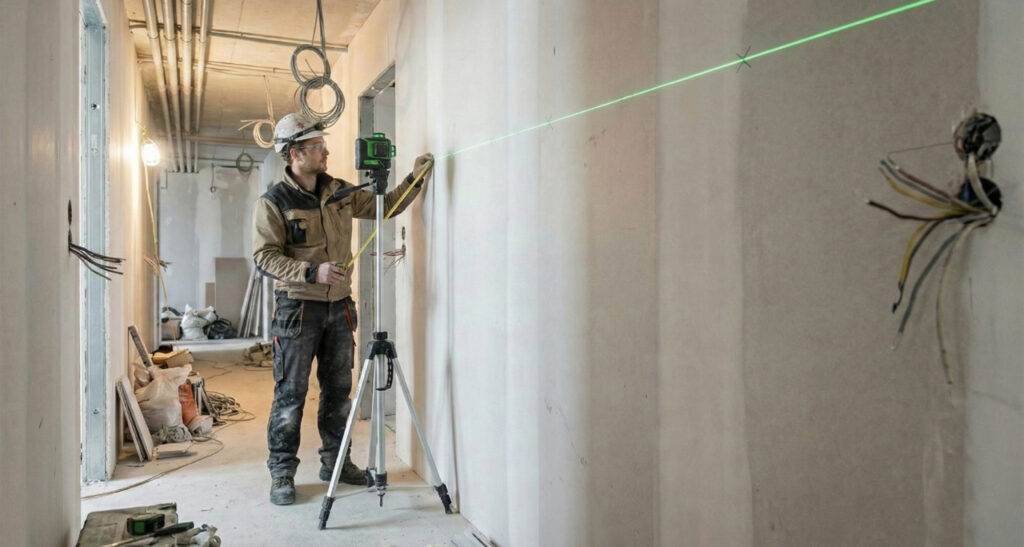
Position Marking
Height, spacing, alignment. Laser level — a spirit level over >5 m produces unevenness. Mark with pencil before drilling.
Base Installation
Level, correct depth. Recessed: exactly at depth — neither deeper nor protruding. Surface: ensure the base is perfectly flush with the wall.
Connection & Testing
Polarity, dimming test, flicker test (smartphone camera slow-mo). Test each luminaire before closing up — replacement after painting = expensive.
Final Adjustment
Beam direction, angle (adjustable), dimming scenes. DALI → addressing, grouping, scene programming now.
Quality Check
Uniformity, glare, shadows. Look from the user's angle — not from below. Check nighttime appearance. Photograph for records.
13. Summary
Wall lighting is not a simple installation — it is a design process that starts from purpose and material, and results in atmosphere.
The 5 key takeaways:
- Type → material: Grazer for textured surfaces, Washer for smooth, Up/Down for rhythm
- Position → glare: always above or below eye line (1.60 m)
- CCT → use: warm (2700K) for relaxation, neutral (4000K) for work, 3000K as default
- IP → environment: IP65+ outdoors, IP67+ coastal, IP20 indoors
- Quality → longevity: driver, flicker, sealing — do not cut costs on the invisible
Frequently Asked Questions (FAQ)
How many watts per luminaire?
It depends — 6W with 12° appears more "powerful" than 12W with 60°. Request lumens + angle, not just wattage.
IP20 outdoors?
Never. Minimum IP54 sheltered, IP65 exposed, IP67 coastal.
DALI or 0-10V?
>10-15 luminaires + scenes → DALI. Small residence 4-6 → 0-10V/Bluetooth. Always install conduit for future DALI.
CRI 80 or 90?
Indoor spaces with human presence → CRI 90+. Outdoors without critical colour evaluation → CRI 80 is sufficient.
How many luminaires do I need?
Rule: spacing between ≤1.5x mounting height. Corridor 10 m with h=2 m → max 3 m between → minimum 4 luminaires.
Summary Table: Application → TECHLUMEN Models
| Application | Models | Key Characteristics |
|---|---|---|
| Architectural facades | CALTO-60/100-S2, QUADRO-W-S2, BILUX, GLIM | IP65–IP67, 5°–86°, CRI 80/90 |
| Residential interiors | UP, WALLY, ALBA-40/80, ROI-W, NODO, CONTORNO-W | 2700K–4000K, DALI, CRI 80–95 |
| Outdoor / Gardens | CALTO-60/100, BILUX, Monolux, QUADRO-W-S2 | IP65–66, IK09, 2700K–4000K |
| Hotels | WALLY, UP, ALBA, ROI-W, NODO, AXIS | DALI, Emergency, CRI 90–95 |
| Safety | WALLY, WD-17, TRUCCO, THIN-IP68 | Emergency 1h/3h, IP66–68 |
| Offices | ALBA, WALLY, PARATO, PI, THIN-P | 3000K–4000K, DALI, CRI 80–95 |